0 概述
对于一个React工程来说,我们需要React,React-Router,Webpack,Typescript,Babel,CSS Modules,Webpack-Dev-Server,按需加载Chunk,js压缩与混淆等等的安装与配置,才能开始启动一个工程,这实在是太麻烦了。
Umi提供了一站式的解决方案,为80%的场景提供了一键生成,对于写Demo和开新项目会方便很多
而且Umi提倡约定大于配置的开发方式,我们基本不需要动配置,就能实现路由注册,全局css文件,按需加载等的功能,值得一用
1 上手
代码在这里
mkdir my-app&cd my-app
npm create @umijs/umi-app
npm install
这样就能开启脚手架,并安装好它的依赖
.
├── .editorconfig
├── .gitignore
├── .prettierignore
├── .prettierrc
├── .umirc.ts
├── README.md
├── mock
│   └── .gitkeep
├── package-lock.json
├── package.json
├── src
│   ├── .umi
│   │   ├── core
│   │   │   ├── devScripts.ts
│   │   │   ├── history.ts
│   │   │   ├── plugin.ts
│   │   │   ├── pluginConfig.d.ts
│   │   │   ├── pluginRegister.ts
│   │   │   ├── polyfill.ts
│   │   │   ├── routes.ts
│   │   │   └── umiExports.ts
│   │   ├── plugin-helmet
│   │   │   └── exports.ts
│   │   ├── plugin-initial-state
│   │   │   ├── Provider.tsx
│   │   │   ├── exports.ts
│   │   │   ├── models
│   │   │   │   └── initialState.ts
│   │   │   └── runtime.tsx
│   │   ├── plugin-model
│   │   │   ├── Provider.tsx
│   │   │   ├── helpers
│   │   │   │   ├── constant.tsx
│   │   │   │   ├── dispatcher.tsx
│   │   │   │   └── executor.tsx
│   │   │   ├── runtime.tsx
│   │   │   └── useModel.tsx
│   │   ├── plugin-request
│   │   │   └── request.ts
│   │   └── umi.ts
│   ├── .umi-production
│   └── pages
│       ├── index.less
│       └── index.tsx
├── tsconfig.json
└── typings.d.ts

12 directories, 34 files
我们能看到,生出的目录如上,它包括了:
- src/.umi文件夹,这里是umi自动生成的页面和cache的包,这个文件夹不要动,每次build的时候它会自动删除并生成的,不要提交到git上
- src/pages文件夹,约定方式的路由文件,我们主要填充代码的地方
- .umirc.ts,Umi的服务器端配置文件,它会影响生成文件的策略
- mock文件夹,作为mock数据生成用作测试的地方
- tsconfig.json,TypeScript的配置文件
- .prettierrc,格式化的配置文件
npm start启动开发用的前端服务器
npm run build
它会在dist文件夹生成以上的文件
2 构建配置与环境变量
代码在这里
2.1 常用构建配置
import { defineConfig } from 'umi';
export default defineConfig({
//url的前缀
//http://localhost:8000/#/docs/
//http://localhost:8000/#/gg
base: '/docs/',
//js文件的输出目录,这里可以填写cdn的名称
//<script src="/static/umi.2738c99d.js"></script>
//<link rel="stylesheet" href="/static/umi.f3c25626.css" />
publicPath: '/static/',
//文件是否应该还有哈希
//umi.f3c25626.css
hash: true,
//跳转页面用hash形式吗
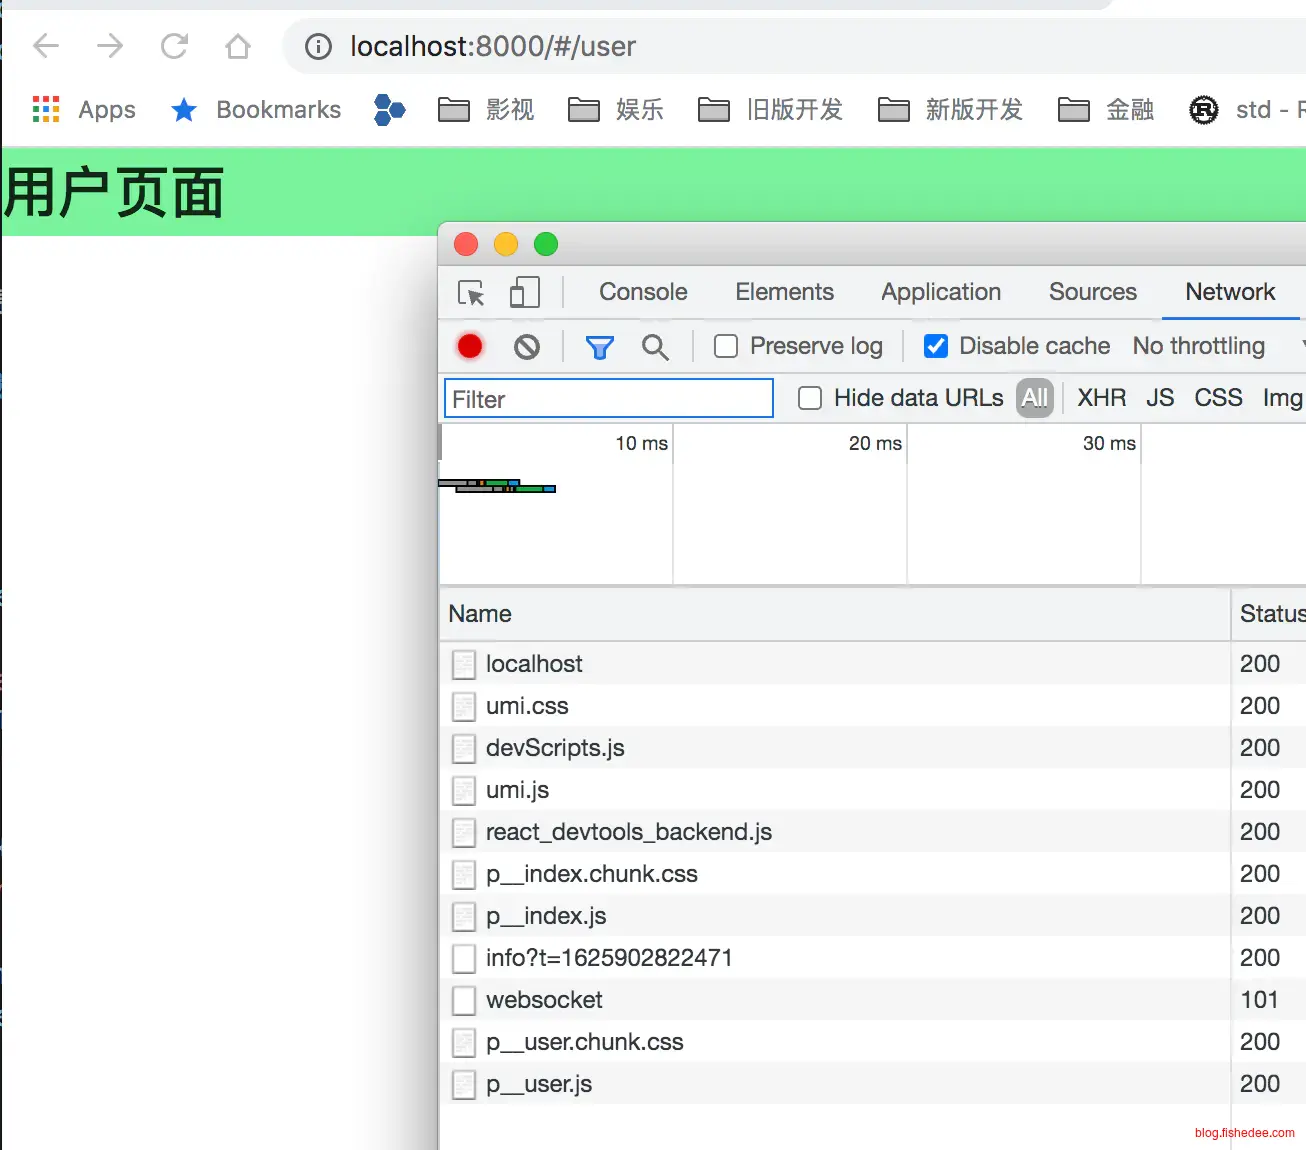
//http://localhost:8000/#/gg
history: {
type: 'hash',
},
nodeModulesTransform: {
type: 'none',
},
//手动的设置路由
routes: [
//http://localhost:8000/#/
{ path: '/', component: '@/pages/index' },
//http://localhost:8000/#/gg
{ path: '/gg', component: '@/pages/dog' },
],
fastRefresh: {},
});修改.umirc.ts文件,填入以上的配置,试一下就知道了
2.2 开发环境的变量
import { defineConfig } from 'umi';

export default defineConfig({
  base: '/animal/'
});
新建.umirc.local.ts文件,填入以上配置,那么当执行umi dev的时候,它会自动与主配置文件.umirc.ts合并。
2.3 自定义环境的配置
import { defineConfig } from 'umi';

export default defineConfig({
  base: '/cat/'
});
新建.umirc.cloud.ts文件,填入以上配置
UMI_ENV=cloud npm run build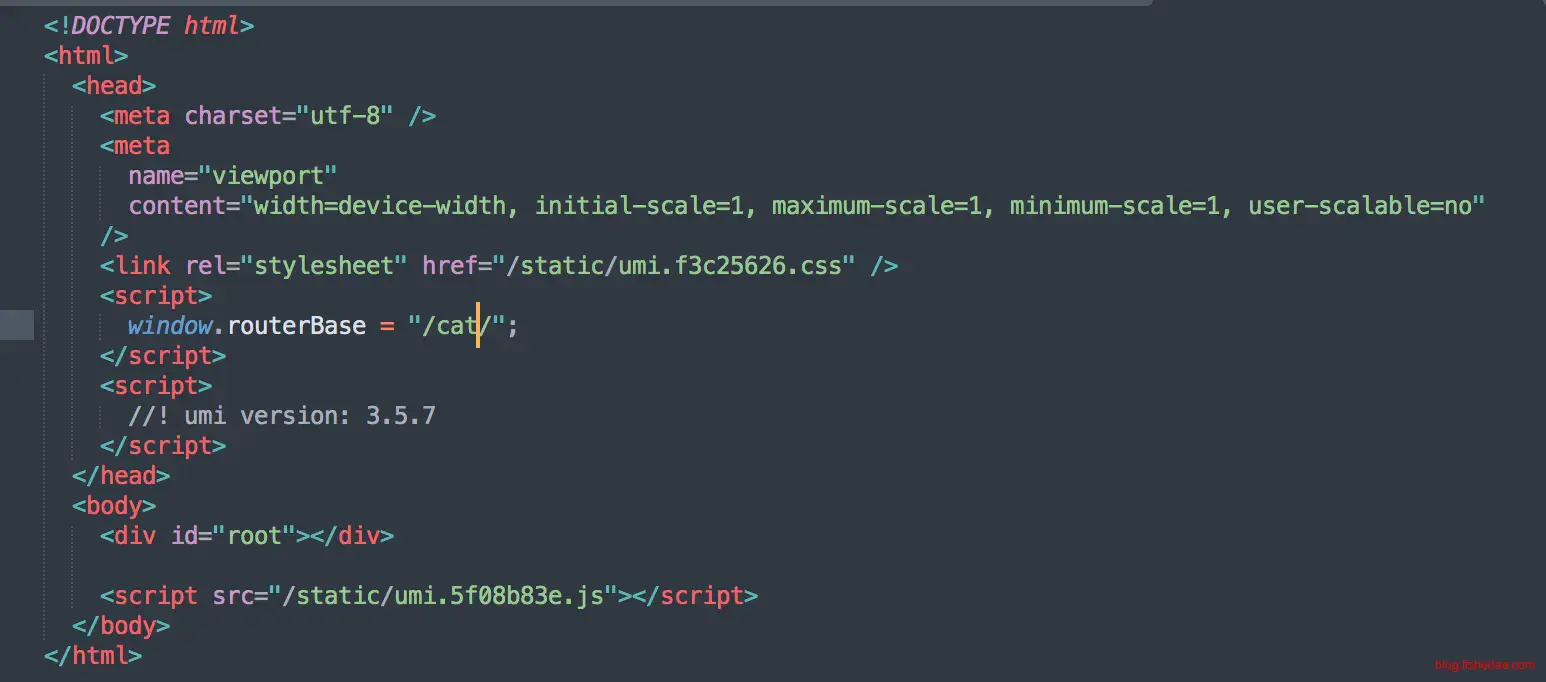
我们就能看到dist文件的index.html的确发生变化了
3 浏览器配置
代码在这里
let extraRoutes:any[];
//在触发render以后,就会触发patchRoutes,以获取路由信息
//整个页面仅触发一次
export function patchRoutes({ routes }) {
  console.log("routes");
  for( var i in extraRoutes){
    routes.push(extraRoutes[i])
  }
}

//页面刚进入的时候,触发这个函数,传入的是闭包
//整个页面仅触发一次
export function render(oldRender) {
  console.log("render");
  setTimeout(()=>{
    //写入动态的路由
    extraRoutes = [{
        path:'/dog',
        exact:true,
        component:require('@/pages/dog').default,
    }];
    oldRender();
  },1000);
}

//路由跳转时的触发
export function onRouteChange({ location, routes, action,matchedRoutes }) {
  console.log("RouteChange",action,location.pathname);
  console.log("matchedRoutes",matchedRoutes);
}
在首页的src/app.tsx填上以上配置则打开了浏览器配置的功能。
4 路由
4.1 声明式路由
代码在这里
import { defineConfig } from 'umi';

export default defineConfig({
  nodeModulesTransform: {
    type: 'none',
  },
  routes: [
    //exact默认为true
    { path: '/', component: '@/pages/index' },

    //exact为false,只要前缀匹配就能成功,最先匹配到component就会最先使用
    //所以在/user/edit页面,依然会显示@/pages/user/index的内容
    { exact:false,path: '/user', component: '@/pages/user/index' },
    { exact:false,path: '/user/edit', component: '@/pages/user/edit'},

    //遇到这个url,会直接跳转,url都会变化,内容显示是list1的内容
    { path: '/list3',redirect: 'list1'},

    //标题
    //不需要配置render,title属性会自动赋值到浏览器的标题上
    {exact:true,path: '/list4',component: '@/pages/list4',title:"我是标题"},

    //包围方式的组件,wrapper与layout的用法很相似,wrapper是针对多个组件的,而layout是多个组件的
    //wrapper的粒度更细,layout粒度粗,但是方便
    {exact:true,path:'/cat',component:'@/pages/cat',wrappers:['@/wrappers/login']},

    //嵌套组件
    {
      path: '/',
      component: '@/layouts/list',
      routes: [
        { path: '/list1', component: '@/pages/list1' },
        { path: '/list2', component: '@/pages/list2' },
      ],
    },


  ],
  fastRefresh: {},
});
在.umirc.ts的构建配置里面的routes里面,我们显式地配置每一个路由
4.1.1 exact
export default function IndexPage() {
  return (
    <div>
      <h1>用户页面</h1>
    </div>
  );
}
@/pages/user/index.tsc的内容
export default function IndexPage() {
  return (
    <div>
      <h1>用户编辑页面</h1>
    </div>
  );
}
@/pages/user/edit.tsc的内容
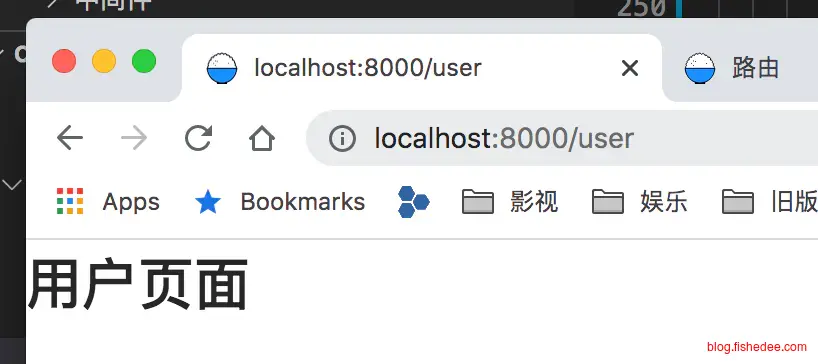
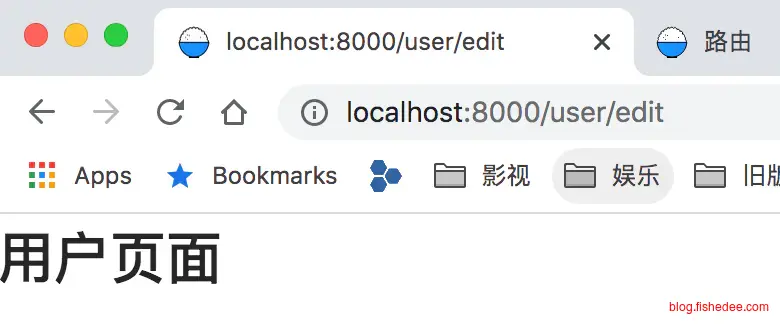
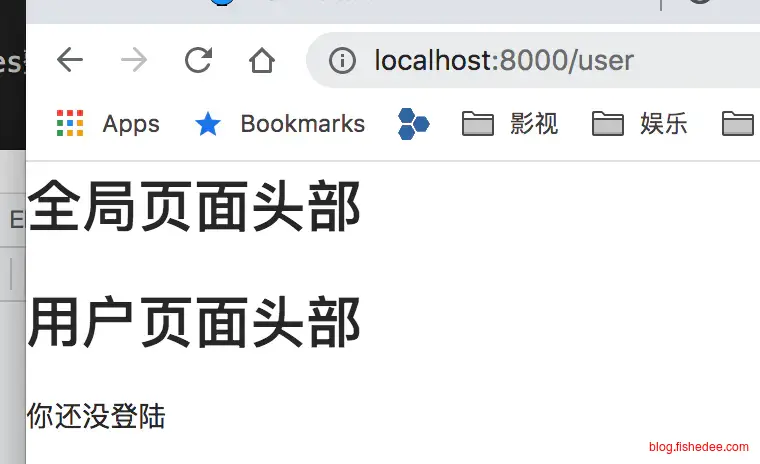
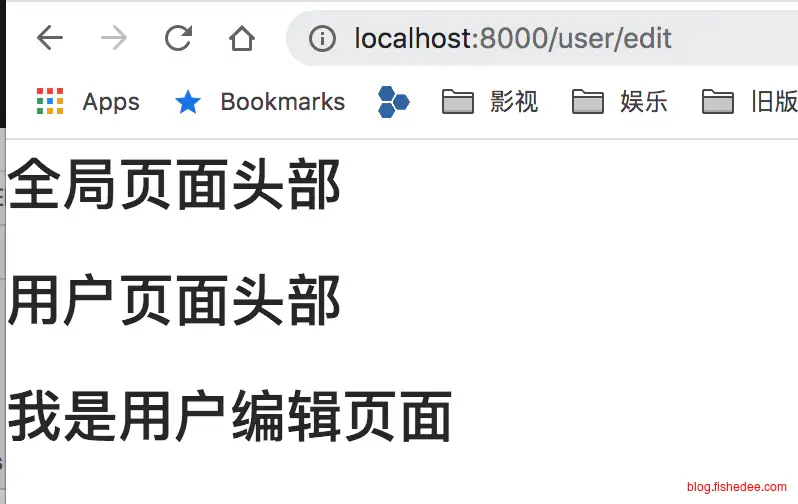
Umi的路由使用最先匹配原则,在路由列表里面最先匹配到的路由,就会马上执行,剩下的路由则会略过。所以,打开/user,和/user/edit页面,他们都是显式用户页面。
exact为false,采取的前缀匹配原则,exact为true(默认值),采取的是完全匹配的原则
4.1.2 redirect
//遇到这个url,会直接跳转,url都会变化,内容显示是list1的内容
    { path: '/list3',redirect: 'list1'},
这个没啥好说的,就是直接跳页面
4.1.3 标题
{exact:true,path: '/list4',component: '@/pages/list4',title:"我是标题"},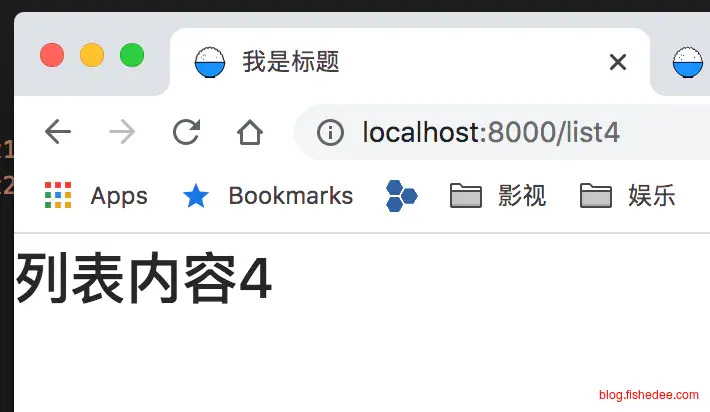
路由里面的title属性默认会改写浏览器标题
4.1.4 wrapper
export default function IndexPage() {
return (
<div>
<h1>这里是汽车页面</h1>
</div>
);
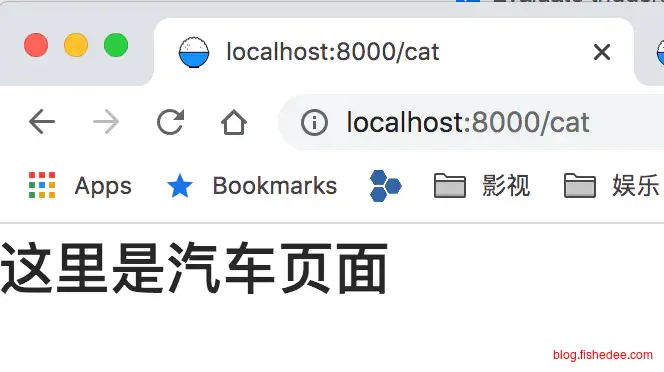
}@/pages/cat.tsx的代码
import { Redirect } from 'umi'

export default (props:any) => {
  const isLogin = Math.random() < 0.5
  console.log(isLogin)
  if (isLogin) {
    return <div>{ props.children }</div>;
  } else {
    return (<div>汽车走了</div>);
  }
}
@/wrappers/login.tsx的代码
//包围方式的组件,wrapper与layout的用法很相似,wrapper是针对多个组件的,而layout是多个组件的
//wrapper的粒度更细,layout粒度粗,但是方便
{exact:true,path:'/cat',component:'@/pages/cat',wrappers:['@/wrappers/login']},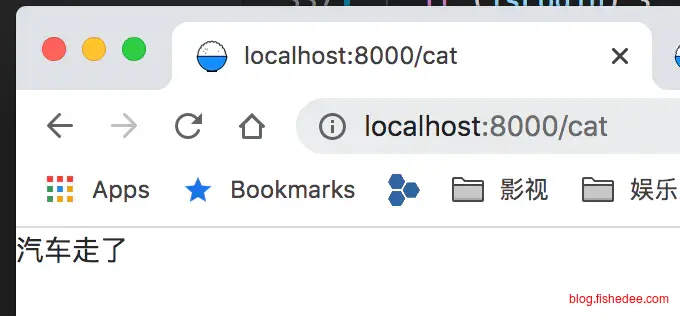
Wrapper就是在组件外面加上包围组件,一般用来做登录态的校验
4.1.5 layout
export default function IndexPage(props) {
  return (
    <div>
      <h1>我是列表头部</h1>
      <div>{props.children}</div>
    </div>
  );
}
@/layouts/list.tsx的代码
export default function IndexPage() {
  return (
    <div>
      <h1>列表内容1</h1>
    </div>
  );
}
@/pages/list1.tsx的代码
export default function IndexPage() {
  return (
    <div>
      <h1>列表内容2</h1>
    </div>
  );
}
@/pages/list2.tsx的代码
 //嵌套组件
{
  path: '/',
  component: '@/layouts/list',
  routes: [
    { path: '/list1', component: '@/pages/list1' },
    { path: '/list2', component: '@/pages/list2' },
  ],
},
这是嵌套组件的写法,指定list1与list2的组件外部都需要被layout包围。

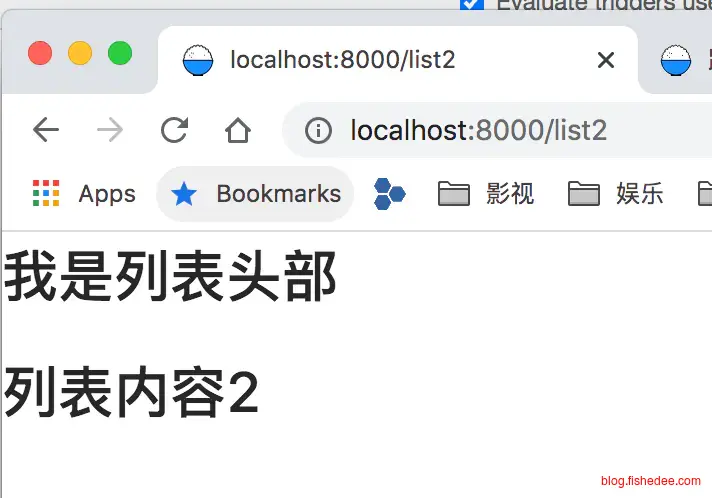
这个时候,list1与list2的外面都有layout包围了。我们看到wrapper与layout都很相似,他们都是在组件外面用另外一层组件包围,他们的区别在于:
- wrapper的粒度更细,只能对单个组件起作用,不能对一堆组件起作用。layout的粒度则可以做得更粗,批量对多个组件起作用
- layout对多个组件包围的时候,多个组件都是共用同一个layout的实例。例如,从list1切换到list2的时候,layout组件用的都是同一个实例,对于需要包围组件保持状态的时候就会特别有用。
4.1.6 最先匹配原则
import { defineConfig } from 'umi';

export default defineConfig({
  nodeModulesTransform: {
    type: 'none',
  },
  routes: [
    //exact默认为true
    { path: '/', component: '@/pages/index' },

    //exact为false,只要前缀匹配就能成功,最先匹配到component就会最先使用
    //所以在/user/edit页面,依然会显示@/pages/user/index的内容
    { exact:false,path: '/user', component: '@/pages/user/index' },
    { exact:false,path: '/user/edit', component: '@/pages/user/edit'},

    //遇到这个url,会直接跳转,url都会变化,内容显示是list1的内容
    { path: '/list3',redirect: 'list1'},


    //包围方式的组件,wrapper与layout的用法很相似,wrapper是针对多个组件的,而layout是多个组件的
    //wrapper的粒度更细,layout粒度粗,但是方便
    {exact:true,path:'/cat',component:'@/pages/cat',wrappers:['@/wrappers/login']},

    //嵌套组件
    {
      path: '/',
      component: '@/layouts/list',
      routes: [
        { path: '/list1', component: '@/pages/list1' },
        { path: '/list2', component: '@/pages/list2' },
      ],
    },

    //标题
    //不需要配置render,title属性会自动赋值到浏览器的标题上
    {exact:true,path: '/list4',component: '@/pages/list4',title:"我是标题"},

  ],
  fastRefresh: {},
});
如果我们将list4路由放在list组件的下面。
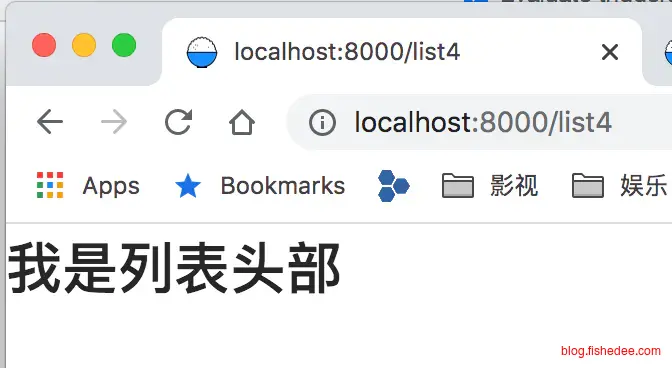
我们就会发现不显示list4组件了,只显示layout组件。因为layout组件是放在list4组件前面的,根据最先匹配原则,即使它的嵌套routes没有匹配到,依然会正常显示layout组件,而不是显示list4组件。
4.3 路由跳转
代码在这里
import { defineConfig } from 'umi';

export default defineConfig({
  nodeModulesTransform: {
    type: 'none',
  },
  history:{
    type: 'hash',
  },
  routes: [
    { path: '/', component: '@/pages/index' },
    { path: '/cat', component: '@/pages/cat',role:"admin"},
    { path: '/dog', component: '@/pages/dog',role:"guest"},
  ],
  fastRefresh: {},
});
这是页面的路由配置
4.3.1 命令式跳转
import styles from './index.less';
import { history } from 'umi';
import { useCallback } from 'react';

export default function IndexPage() {
  let go1 = useCallback(()=>{
    history.push("/cat");
  },[]);

  //可以带上参数
  let go2 = useCallback(()=>{
    history.push({
      pathname:"/dog",
      query:{
        name:"Kate",
      },
      state:{
        count:"count",
      }
    });
  },[]);
  return (
    <div>
      <h1 className={styles.title}>我是主页</h1>
      <div><a onClick={go1}>去猫</a></div>
      <div><a onClick={go2}>去狗</a></div>
    </div>
  );
}
这是命令方式的跳转,使用umi的history方法,push方法可以传入query与state,query会改变页面的url,而state是一次性的数据传入,不会改变页面的url
import styles from './index.less';
import { history } from 'umi';
import { useCallback } from 'react';

export default function IndexPage() {
  let goBack = useCallback(()=>{
    history.goBack();
  },[]);
  return (
    <div>
      <h1 className={styles.title}>我是猫</h1>
      <div><a onClick={goBack}>返回</a></div>
    </div>
  );
}
这是命令方式的返回跳转,而是相当简单的了
4.3.2 声明式跳转
import { history,Link} from 'umi';

export default function IndexPage(){
  return (
    <div>
      <h1 className={styles.title}>我是狗</h1>
      <InnerComponent/>
      <div><Link to="/cat">去猫</Link></div>
    </div>
  );
}
使用Link标签可以做声明方式的跳转
4.3.3 跳转参数
import styles from './index.less';
import { history,Link,useLocation ,useRouteMatch,useHistory} from 'umi';
import { useCallback } from 'react';
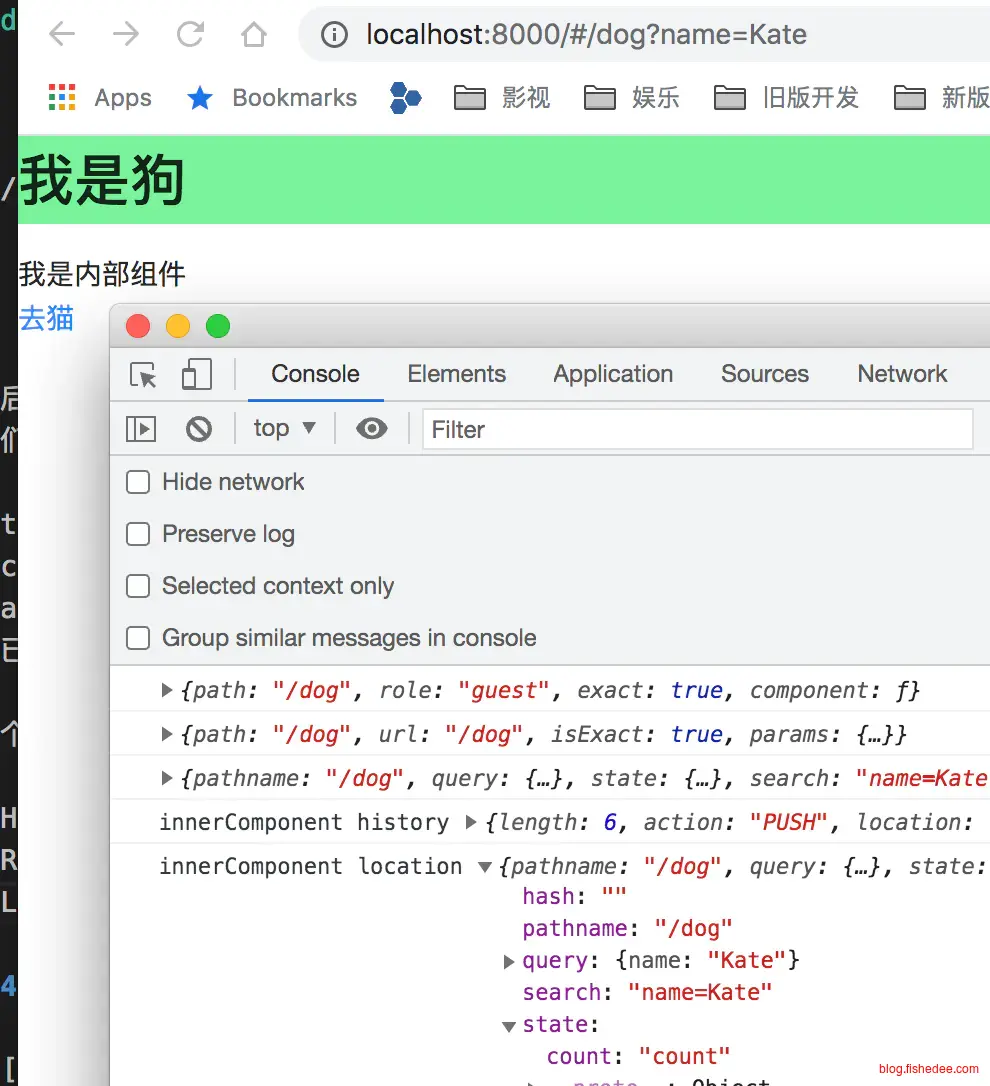
function InnerComponent(){
//可以获取到history,方便跳转使用
let history = useHistory();
console.log("innerComponent history",history);
/*
{pathname: "/dog", query: {…}, state: {…}, search: "name=Kate", hash: ""}
hash: ""
pathname: "/dog"
query: {name: "Kate"}
search: "name=Kate"
state: {count: "count"}
__proto__: Object
*/
//带有类型提示的location,并且跨多个组件使用
let location = useLocation();
console.log("innerComponent location",location);
/*
{path: "/dog", url: "/dog", isExact: true, params: {…}}
isExact: true
params: {}
path: "/dog"
url: "/dog"
*/
let match = useRouteMatch();
//match获取了匹配的地址信息,params是url上面的参数
console.log("innerComponent match",match);
return (<div>我是内部组件</div>);
}
export default function IndexPage(props) {
//获取匹配的路由信息,可以获取路由设置上的参数信息
/*
component: ƒ IndexPage(props)
exact: true
path: "/dog"
role: "guest"
*/
console.log(props.route);
//match获取了匹配的地址信息,params是url上面的参数
/*
{path: "/dog", url: "/dog", isExact: true, params: {…}}
isExact: true
params: {}
path: "/dog"
url: "/dog"
*/
console.log(props.match);
//location获取了匹配的参数,区分了query与state
//state在返回的时候会丢失,但是query会保存下来
/*
{pathname: "/dog", query: {…}, state: {…}, search: "name=Kate", hash: ""}
hash: ""
pathname: "/dog"
query: {name: "Kate"}
search: "name=Kate"
state: {count: "count"}
__proto__: Object
*/
console.log(props.location);
//使用Link标签
return (
<div>
<h1 className={styles.title}>我是狗</h1>
<InnerComponent/>
<div><Link to="/cat">去猫</Link></div>
</div>
);
}跳转以后,我们需要拿到路由的几个参数,这几个参数都是在props中获得的,它们包括:
- route,匹配路由的配置信息
- match,路由url中的参数的信息,当url是/user/:id的时候
- location,这个经常用,我们拿state与query的地方。query与state已经拆解好了,不需要再进行qs.parse的操作
另外一个方便的方法是:
- useHistory,获取history对象
- useRouteMatch,获取match对象
- useLocation,获取location对象
值得注意的是,当页面是从主页push到/dog页面的,state对象会有信息
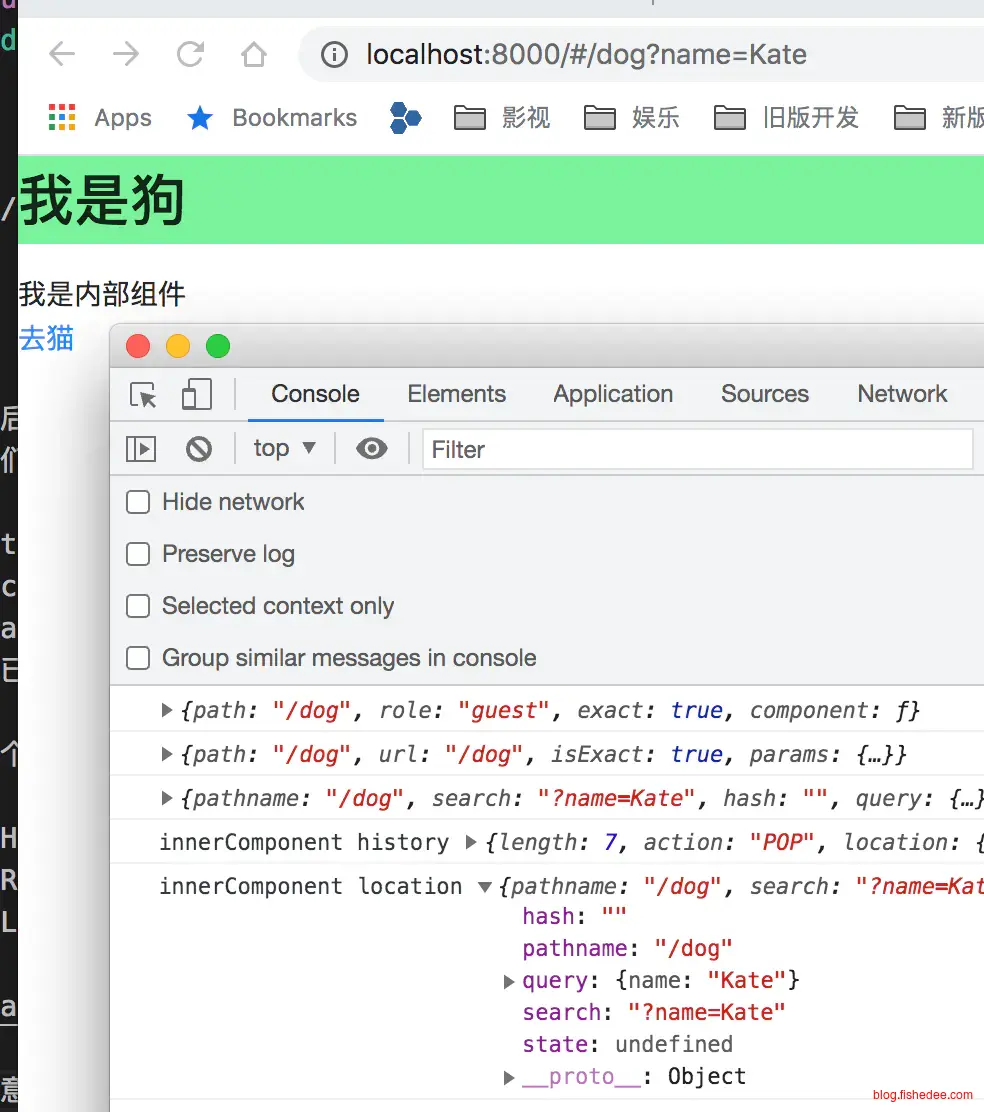
但是从/cat页面返回到/dog页面的时候,state对象就是空的
4.4 约定式路由
代码在这里
Umi的一个方法是,使用约定式路由,不需要手动再写routes数组了,方便多了
4.4.1 url
import { defineConfig } from 'umi';

export default defineConfig({
  nodeModulesTransform: {
    type: 'none',
  },

  //完全注释routes内容,不要将routes设置为空数组,这样才能开启约定式路由
  /*
  routes: [
  ],
  */

  fastRefresh: {},
});
这是.umirc.ts的配置,注意把routes整个注释掉了,这样才会打开约定式路由
.
├── layouts
│   └── index.tsx
├── pages
│   ├── 404.tsx
│   ├── cat.tsx
│   ├── index.less
│   ├── index.tsx
│   └── user
│       ├── _layout.tsx
│       ├── edit.tsx
│       └── index.tsx
└── wrappers
    └── auth.tsx

4 directories, 9 files
页面的路径配置如上
那么,打开主页的时候会匹配@/pages/index文件
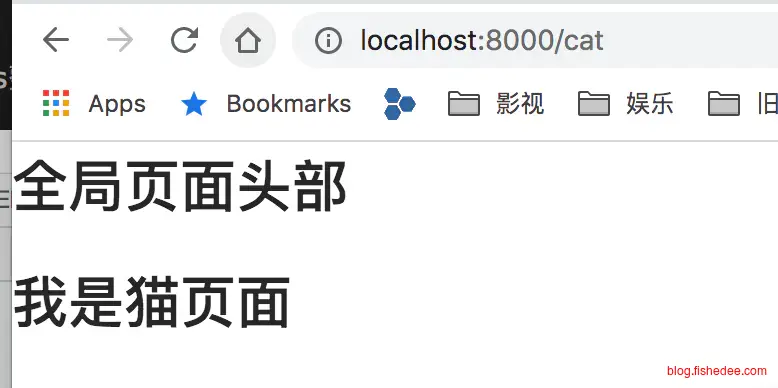
打开/cat路径的时候匹配@/pages/cat文件
打开/user路径的时候匹配@/pages/user/index文件
打开/user/edit路径的时候匹配@/pages/user/edit文件
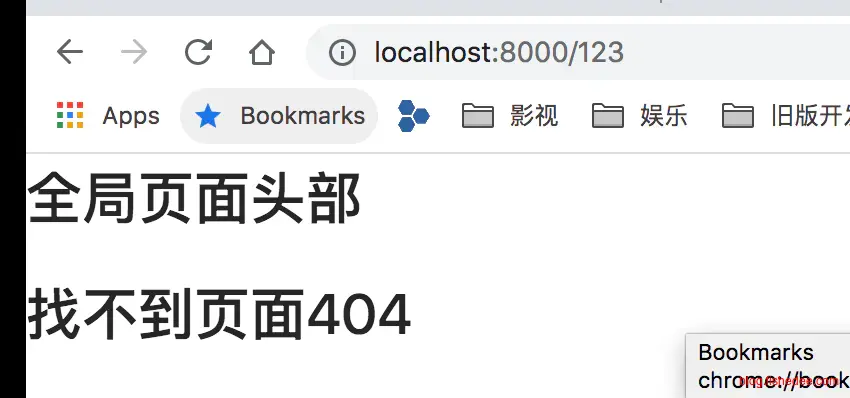
最后404页面,就是路由匹配错误的页面了,没啥好说的,这个路径是Umi约定好,不能改
这样的约定方式还是相当直观的
4.4.2 layout
import { ReactNode } from "react";
type Props = {
children:ReactNode
}
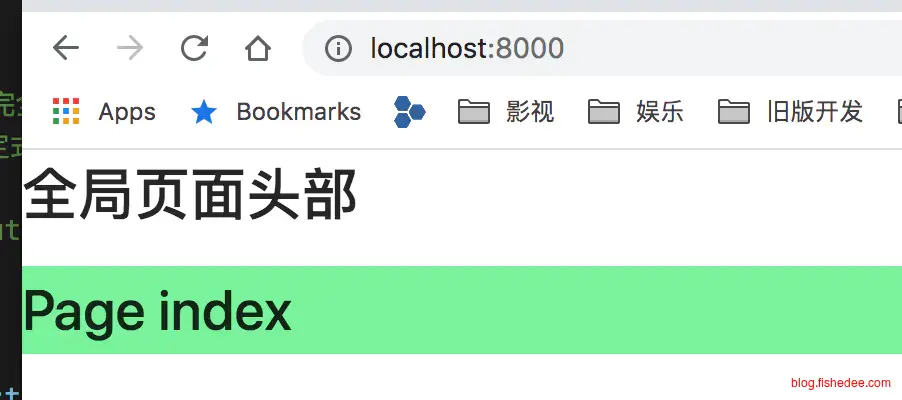
export default function IndexPage(props:Props) {
//全局layout
return (
<div>
<h1>全局页面头部</h1>
<div>{props.children}</div>
</div>
);
}Umi默认的@/layouts/index文件下放的就是全局的layout文件,这个路径是Umi约定好,不能改
import { ReactNode } from "react";

type Props = {
    children:ReactNode
}
export default function IndexPage(props:Props) {
  //仅user页面的layout
  return (
    <div>
      <h1>用户页面头部</h1>
      <div>{props.children}</div>
    </div>
  );
}
而以上文件是在@/pages/user/_layout文件时,这个就是user路径下的layout文件
4.4.3 标题
export default function IndexPage() {
  return (
    <div>
      <h1>我是猫页面</h1>
    </div>
  );
}

//这样是错误写法,要先写入属性,再export
IndexPage.title = "猫页面"
我们也可以配置每个组件的标题,这样写是错误的
function IndexPage() {
    return (
      <div>
        <h1>我是用户编辑页面</h1>
      </div>
    );
  }

IndexPage.title = "用户编辑页面"
export default IndexPage
这样写才是对的
相似地,你可以配置页面的其他属性
4.4.4 wrapper
function IndexPage() {
    return (
      <div>
        <h1>我是用户主页面</h1>
      </div>
    );
  }

IndexPage.wrappers = ['@/wrappers/auth'];
export default IndexPage
我们可以手动设置某个组件的wrapper
import { ReactNode } from "react";

type Props = {
    children:ReactNode
}
export default function IndexPage(props:Props) {
    let isAuth = Math.random()<0.5
    if( isAuth ){
        return props.children
    }else{
        return <div>你还没登陆</div>
    }
  }
这是wrapper代码
5 样式文件
代码在这里
5.1 全局样式
/*
类名不改,默认放在文件的最前面
*/
.my-button{
    color:red;
    font-size:40px;
}
将css文件写在src/global.css文件中,这个路径是Umi约定好,不能改,这个样式文件的类名不改,同时放在所有样式文件的前部
5.2 CSS模块与非CSS模块
/*
CSS Module的引用方式,除了:global包围的,其他类名都被自动改写
*/
.my-div{
    color:yellow;
}

:global(.title){
    color:green;
}
以上是css模块,类名默认都是会改动的,对于需要不改的类型,要用:global包围,放在src/index.css文件中
/*
非CSS Module的引用方式,类名都不会改写
*/

h1{
    border:1px solid black;
}
以上是非css模块,类名默认都是不改的
//css模块
import styles from './index.css';

//非css模块
import './index2.css'

export default function IndexPage() {
  return (
    <div>
      <h1 className={"my-button"}>全局样式</h1>
      <h1 className={styles["my-div"]}>CSS模块,类名改动样式</h1>
      <h1 className={"title"}>CSS模块,类名不改动样式</h1>
    </div>
  );
}
对于css文件是模块的,还是非模块的,完全是按照引入的方式来自动决定的
6 按需加载
代码在这里
import { defineConfig } from 'umi';

export default defineConfig({
  nodeModulesTransform: {
    type: 'none',
  },
  history:{
    type:'hash',
  },
  dynamicImport: {},
  fastRefresh: {},
});
在配置中加入dynamicImport就可以了
这个时候,你看到@pages下的页面都会自动切分为多个chunk,按需加载了
7 Mock与Proxy
代码在这里
7.1 Mock
export default {
  // 支持值为 Object 和 Array
  'GET /api/users': { users: [1, 2] },

  // GET 可忽略
  '/api/users/1': { id: 1 },

  // 支持自定义函数,API 参考 express@4
  'POST /api/users/create': (req, res) => {
    // 添加跨域请求头
    res.setHeader('Access-Control-Allow-Origin', '*');
    res.end('ok');
  },
}
在mock/user.ts文件中填写以上代码
import { useCallback ,useState} from 'react';
import styles from './index.less';
import axios from 'axios';

export default function IndexPage() {
  let [userIds,setUserIds] = useState<number []>([]);
  let getUserIds = useCallback(async()=>{
      let data = await axios('/api/users');
      setUserIds(data.data.users)
  },[]);
  return (
    <div>
      <h1 className={styles.title}>Page index</h1>
      <button onClick={getUserIds}>拉user数据</button>
      <div>
        <h2>userId数据</h2>
        <div>{userIds}</div>
      </div>
  )
}
那么我们直接用普通ajax的方法,就能拉到mock里面的数据,相当方便简单
7.2 Proxy
但是,更多情况,我们是希望直接连服务器,测试代码。另外一方面,前端跑在webpack-dev-server里面的localhost:8000,后端跑在其他端口或者其他端口上,这样可不能直接用ajax调用,怎么办?
umi提供了dev-server的proxy功能,就是接口的发送中转站。
import { defineConfig } from 'umi';

export default defineConfig({
  nodeModulesTransform: {
    type: 'none',
  },
  routes: [
    { path: '/', component: '@/pages/index' },
  ],
  proxy: {
    //将/myapi开头的请求改为到'http://jsonplaceholder.typicode.com/'的请求
    '/myapi': {
      'target': 'http://jsonplaceholder.typicode.com/',
      'changeOrigin': true,
      //将/myapi/todos转换为/todos的url
      'pathRewrite': { '^/myapi' : '' },
    },
  },
  fastRefresh: {},
});
首先打开配置文件,设置proxy
import { useCallback ,useState} from 'react';
import styles from './index.less';
import axios from 'axios';

type Todo = {
  id:number
  title:string
}
export default function IndexPage() {
  let [userIds,setUserIds] = useState<number []>([]);
  let getUserIds = useCallback(async()=>{
      let data = await axios('/api/users');
      setUserIds(data.data.users)
  },[]);
  let [todos,setTodos] = useState<Todo []>([]);
  let getTodos = useCallback(async()=>{
      let data = await axios('/myapi/todos');
      setTodos(data.data)
  },[]);
  return (
    <div>
      <h1 className={styles.title}>Page index</h1>
      <button onClick={getUserIds}>拉user数据</button>
      <div>
        <h2>userId数据</h2>
        <div>{userIds}</div>
      </div>
      <button onClick={getTodos}>拉todos</button>
      <div>
        <h2>todos数据</h2>
        <div>{todos.map((item)=>(<li key={item.id}>{item.title}</li>))}</div>
      </div>
    </div>
  );
}
然后我们就能直接axios欢快地写代码了,没有跨域等问题
8 模块查找
8.1 打包时模块查找
代码在这里
在默认情况下,Umi使用类似node的方式查找模块,就是先查找当前目录的node_modules下的模块,如果没有找到该模块的话,不断递归查找到父级的node_modules下的模块。
但是,Umi有一个Alias配置能让我们更直接地指定特定模块的具体位置在哪里。
export default ()=>{
return "aa";
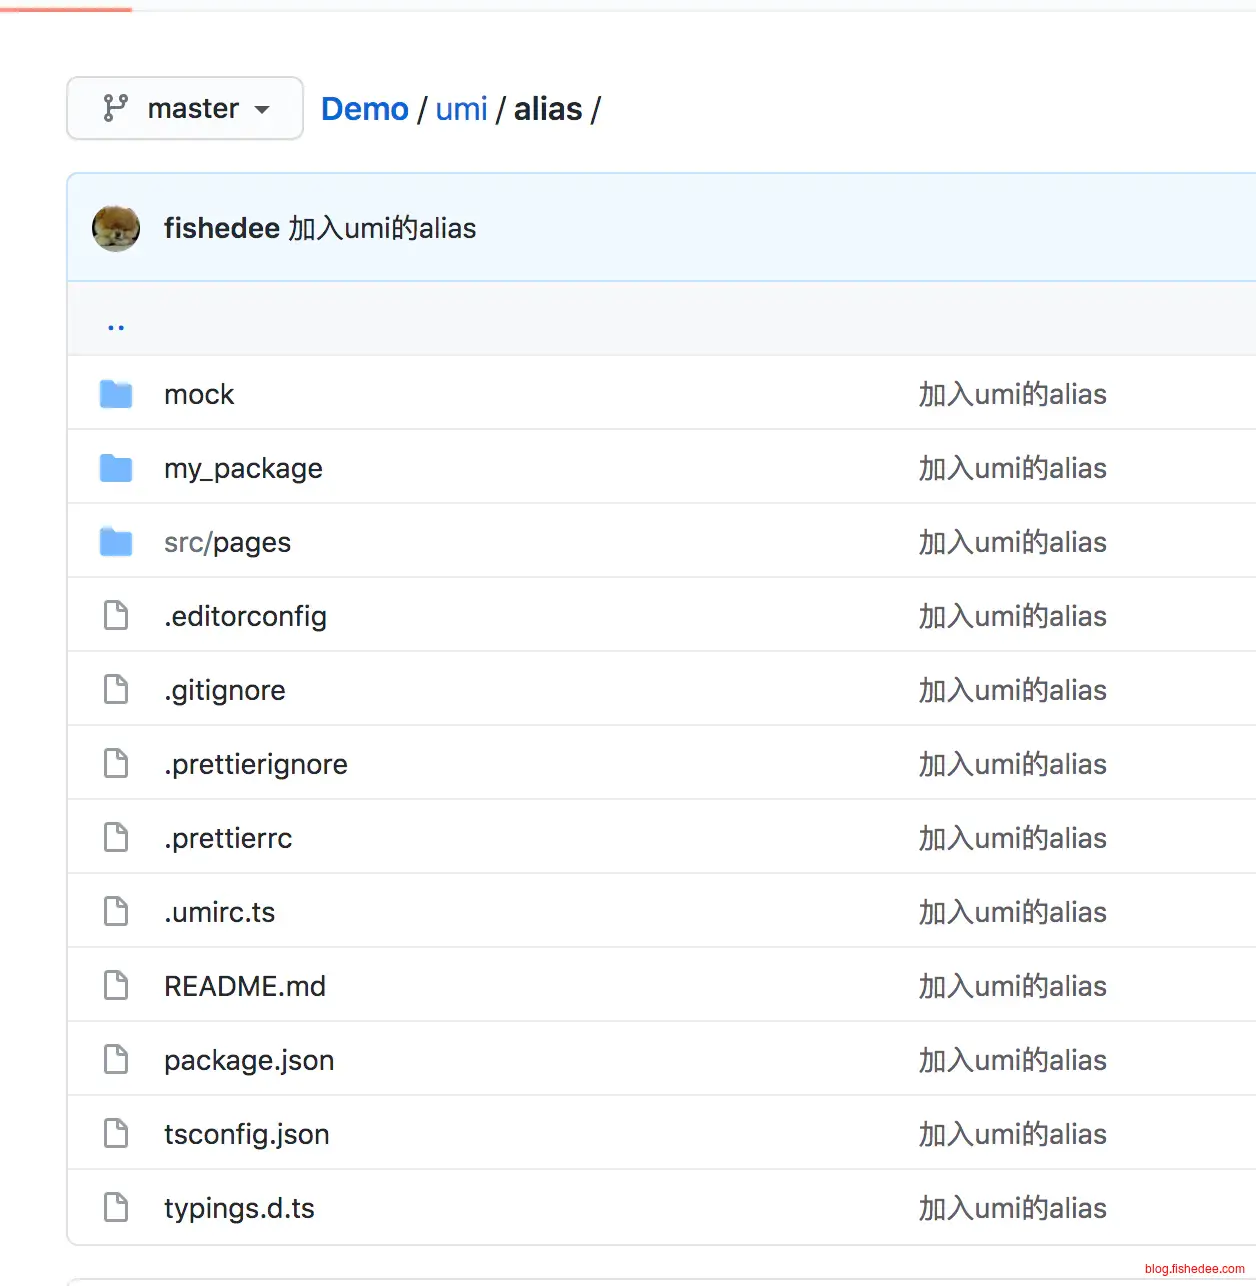
}首先我们在项目的根目录,建立一个my_package的目录,放入index.js,使用以上的代码文件。显然,这个包不是在src目录后,Umi默认情况下是不能查找到这个包的。
import { defineConfig } from 'umi';
import path from 'path';

export default defineConfig({
  ....
  alias:{
    'my_package':path.resolve(__dirname,"./my_package"),
  }
});
修改.umirc.ts文件,加入alias路径,直接指定my_package包的位置在哪里。
import styles from './index.less';
import MyPackage from 'my_package';

export default function IndexPage() {
  console.log(MyPackage());
  return (
    <div>
      <h1 className={styles.title}>Page index</h1>
    </div>
  );
}
这个时候,我们会发现,src路径下的index.tsx文件能正常使用到这个my_package包了
注意,现在alias里面的包,Umi是不负责进行编译的,所以不能在alias路径里面放入ts文件,而应该放入已经编译好的js文件。
8.2 编译时模块查找
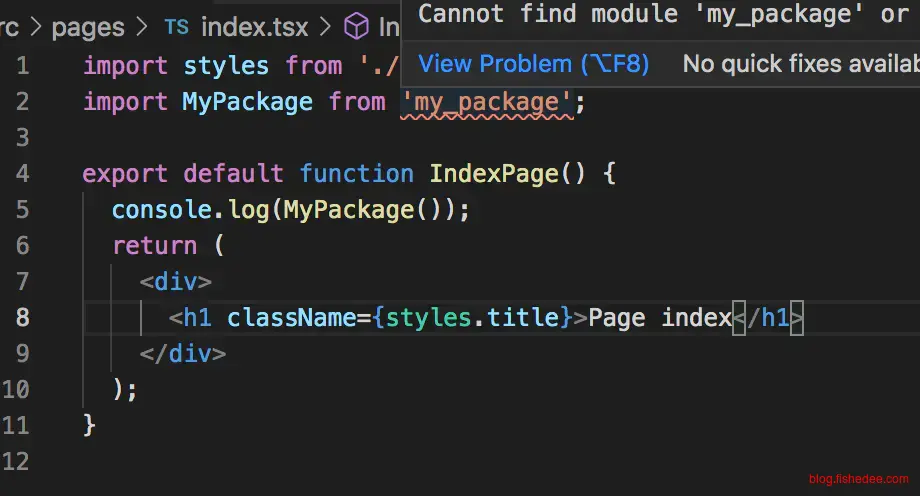
但是我们会发现,编译时无法查找到这个模块。这是因为,打包时的模块查找是由Umi负责的,但是编译时的模块查找是由TypeScript负责的,我们需要填写正确的paths路径才能运行。
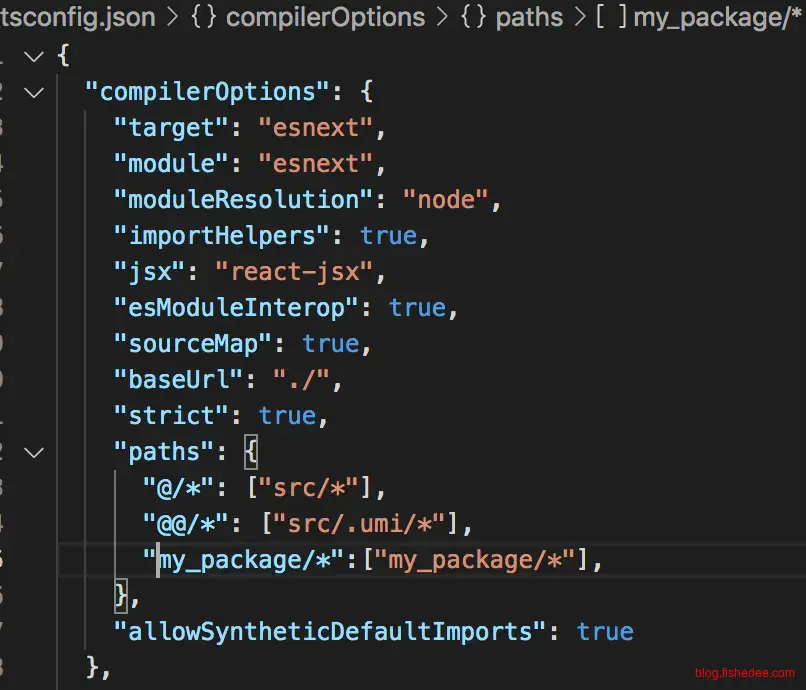
修改tsconfig.json,填写paths配置项,重启即可
9 发布配置
代码在这里
import { defineConfig } from 'umi';

export default defineConfig({
  nodeModulesTransform: {
    type: 'none',
  },

  //资源文件.css,.js,和.html这些的url前缀
  publicPath:'/static/',

  //页面路由的url前缀
  base:'kk',

  //打包后输出的文件夹
  outputPath:'/myDist',

  fastRefresh: {},
});
在.umi.rs上面配置以上的配置,注意不同path之间的含义
<!doctype html>
    <html>
    <head>
        <meta charset="utf-8" />
        <link rel="icon" type="image/x-icon" href="<%= context.config.publicPath %>favicon.png" />
        <title>Your App</title>
    </head>
    <body>
        <div id="root"></div>
        <div style="height:500px;background-color: red;">MMMMMM</div>
    </body>
</html>
在src/pages/document.ejs文件中填写以上的内容,这样就能设置输出的主页html模板文件
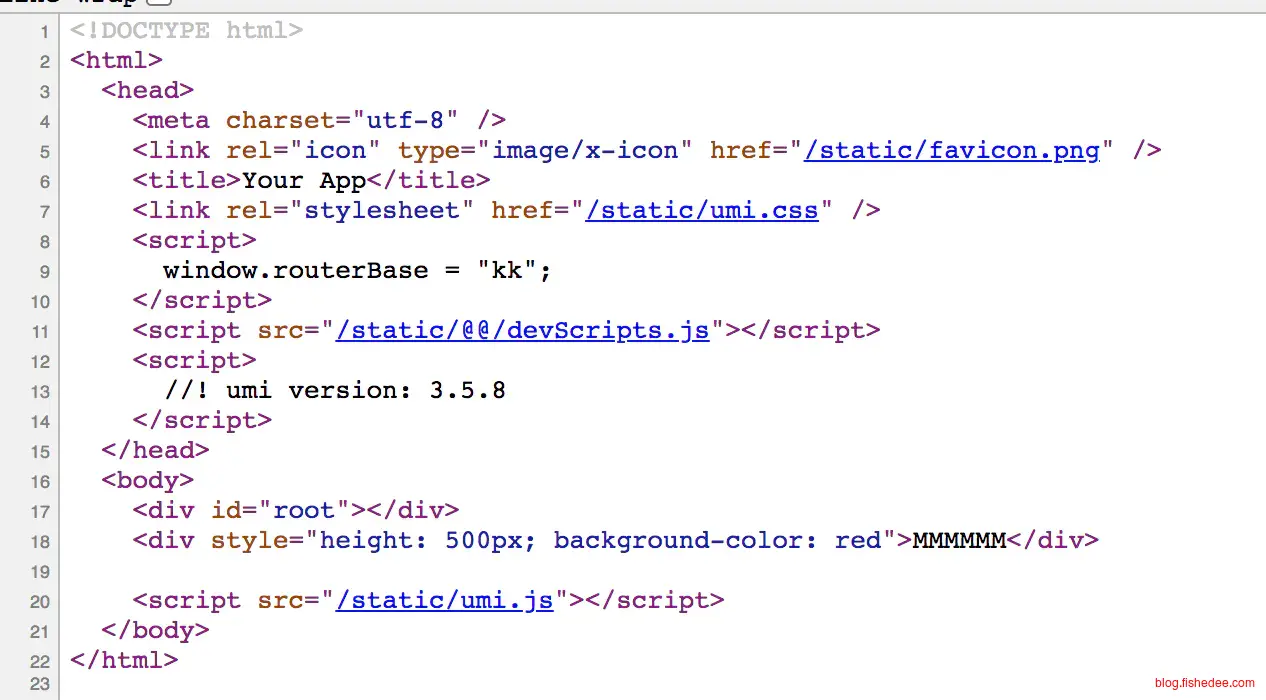
可以看到输出的模板文件中,指向的静态资源文件加入了/static前缀,路由加入了/kk前缀。
.
├── README.md
├── dist
│   ├── index.html
│   ├── umi.css
│   └── umi.js
├── mock
├── myDist
│   ├── index.html
│   ├── umi.css
│   └── umi.js
而用npm run build输出打包的时候,输出文件夹放到了myDist文件夹,而不是默认的dist文件夹了。
10 插件
10.1 @umijs/plugin-model
代码在这里
import { useState, useCallback } from 'react'

export default function useAuthModel() {
  const [user, setUser] = useState(null)

  const signin = useCallback((account, password) => {
        setTimeout(()=>{
            setUser(100);
        },100)
  }, [])

  const signout = useCallback(() => {
    setTimeout(()=>{
        setUser(null);
    },100)
  }, [])

  return {
    user,
    signin,
    signout
  }
}
首先,在src/models/auth.js中建立以上的代码,就是一个普通的代码,文件名必须为auth.js。
import { useModel } from "umi";
import { ReactNode } from "react";

type Props = {
    children:ReactNode
}
export default function IndexPage(props:Props) {

  const {user,signin,signout} = useModel('auth');
  //仅user页面的layout
    return (
      <div>
        <h1>用户页面头部,当前用户为:<span>{user}</span></h1>
        <div>{props.children}</div>
      </div>
    );
  }
然后在src/pages/user/_layout.tsx中写入以上代码,注意使用useModel,而不是用useAuthModel来引入这个hooks,useModel的参数刚好就是文件名auth。这段代码的返回值刚好就是useAuthModel的返回值。我们只用到它的user参数,用来展示当前用户。
import { useModel } from "umi";

function IndexPage() {

    const {user,signin,signout} = useModel('auth');

    return (
      <div>
        <h1>我是用户主页面</h1>
        <button onClick={signin}>{'登录'}</button>
        <button onClick={signout}>{'登出'}</button>
      </div>
    );
  }

IndexPage.wrappers = ['@/wrappers/auth'];
export default IndexPage
最后再src/pages/user/index.tsx中写入以上代码,我们用到了useAuthModel中的signin与signout。

然后我们在/user页面中就能测试到,index模块,与layout模块是在不同的组件中,但是他们依然可以使用useState来跨组件传递数据,这其实是在useModel中偷偷做了手脚实现的。
我觉得这个设计挺棒的,没有改变useState的语义,可以设置快照值,并拿出快照值的地方。仅仅将useAuthModel转换为useModel(‘auth’)就能实现全局的状态共享,而不是组件内部的状态共享。
src/models/里面的文件建议只包含useState,和自定义的方法,不要内嵌有useCallback,useEffect的这些方法,它们是不符合全局状态共享的使用规则的。
10.2 @umijs/plugin-inital-state
代码在这里
plugin-inital-state是在plugin-model上进一步包装,提供了初始状态的全局共享的方式。而plugin-model是需要src/models/中有对应的hooks文件中才会打开的(默认是关闭的),因此,在使用plugin-inital-state的时候要注意,先在src/models中新增任意的hooks文件才能正常使用
let id:number = 1000;

function wait(timeout:number){
    return new Promise((resolve)=>{
        setTimeout(resolve,timeout);
    });
}
/**
 * 不能在getInitialState使用其他的model
 * @see  https://umijs.org/zh-CN/plugins/plugin-initial-state
 * */
export async function getInitialState() {
    const fetchCurrentUser = async ()=>{
        await wait(1000);
        return id++;
    }
    const currentUser = await fetchCurrentUser();
    return {
        currentUser:currentUser,
        fetchCurrentUser:fetchCurrentUser,
    };
}

const MyLoading = ()=>{
    return (<div style={{height:'500px',textAlign:"center",lineHeight:"500px",fontSize:40,color:'red'}}>{"正在加载中..."}</div>)
}

/** 获取用户信息比较慢的时候会展示一个 loading */
export const initialStateConfig = {
    loading: <MyLoading/>,
};
在src/app.tsx中添加以上的代码即可。umi很贴心地提供了initialStateConfig和getInitialState,用来做加载动画,以及初始状态拉取的回调。
import { useModel } from "@/.umi/plugin-model/useModel";

export default function IndexPage() {
  const {initialState,setInitialState} = useModel('@@initialState');
  return (
    <div>
      <h1>我是猫页面</h1>
      <div>当前用户为:{initialState?.currentUser}</div>
      <button onClick={async()=>{
          let newId = await initialState?.fetchCurrentUser();
          setInitialState({
            currentUser:newId!,
            fetchCurrentUser:initialState?.fetchCurrentUser!,
          });
      }}>{"点我"}</button>
    </div>
  );
}

//这样是错误写法,要先写入属性,再export
IndexPage.title = "猫页面"
在src/pages/cat.tsx中加入以上代码即可,由于inital-state是没有像plugin-model这种的useState方法的,所以,在onClick方法里面,在拉取了数据以后,还需要手动调用一下setInitialState才能更新初始状态。
// src/access.ts
export default function(initialState) {
  const { userId, role } = initialState;

  return {
    canReadFoo: true,
    canUpdateFoo: role === 'admin',
    canDeleteFoo: foo => {
      return foo.ownerId === userId;
    },
  };
}
10.3 @umijs/plugin-access
umi还进一步在封装了plugin-access组件,在拉取首次inialState,或者调用setInitalState方法以后,能调用约定的src/access.ts文件下的方法,将initalState转换为access
import React from 'react';
import { useAccess } from 'umi';

const PageA = props => {
  const { foo } = props;
  const access = useAccess();

  //js判断access
  if (access.canReadFoo) {
    // 如果可以读取 Foo,则...
  }

  //组件判断access
   return (
    <div>
      <Access
        accessible={access.canReadFoo}
        fallback={<div>Can not read foo content.</div>}
      >
        Foo content.
      </Access>
    </div>
};

export default PageA;
之后我们就能用useAccess来获取访问权限数据,可以用js来判断,也可以用组件包装器来包装组件即可,这些都是比较简单的,就没写代码了
10 单元测试
代码在这里
"devDependencies": {
  "@types/jest": "^26.0.22",
  "@types/enzyme": "^3.10.9",
  "@types/enzyme-adapter-react-16": "^1.0.6",
  "@umijs/test": "^3.5.7",
  "enzyme": "^3.11.0",
  "enzyme-adapter-react-16": "^1.15.6",
  "enzyme-to-json": "^3.6.2",
}
加入jest以及enzyme的依赖
npm run build
npm run test
要注意的是,要先执行build,然后才执行test,否则test的时候一直用的是dist文件夹的内容,那就没有意义了
10.1 基础测试
const sleep = (time:number)=>{
    return new Promise((resolve,reject)=>{
        setTimeout(resolve,time);
    })
}
const sleepNone = (time:number)=>{
    return new Promise((resolve,reject)=>{
        reject('Something Evil happen');
    })
}

export default {
    sum(a:number, b:number) {
      return a + b;
    },
    getAuthor() {
        return {
            name: 'LITANGHUI',
            age: 24,
        }
    },
    getIntArray(num:any) {
        if (!Number.isInteger(num)) {
          throw Error('"getIntArray"只接受整数类型的参数');
        }

        let result = [];
        for (let i = 0, len = num; i < len; i++) {
          result.push(i);
        }

        return result;
    },
    async fetchUser() {
        await sleep(100);
        return 10001;
    },
    async fetchUserNoneReturn() {
        await sleepNone(100);
        return 10001;
    }
  }
写一个简单的工具方法,包含了返回普通类型,对象类型,异常,以及异步方法
import functions  from './sum';

test('sum(2 + 2) 等于 4', () => {
  expect(functions.sum(2, 2)).toBe(4);
})

test('对象的深度比较,用toEqual', () => {
    expect(functions.getAuthor()).toEqual(functions.getAuthor());
})

test('对象的引用比较,用toBe', () => {
    expect(functions.getAuthor()).not.toBe(functions.getAuthor());
})

test('异常检查', () => {
    function getIntArrayWrapFn() {
      functions.getIntArray(3.3);
    }
    expect(getIntArrayWrapFn).toThrow('"getIntArray"只接受整数类型的参数');
})

test('异步检查', async () => {
    //异步检查中需要这一句,否则可能因为await 没有返回而漏掉测试
    expect.assertions(1);
    let userId = await functions.fetchUser();
    expect(userId).toEqual(10001)
})

test('含有异常的异步检查', async () => {
    //注释下面这一句以后,会将测试错误掩盖掉
    //expect.assertions(1);
    try{
        let userId = await functions.fetchUserNoneReturn();
        expect(userId).toEqual(10001)
    }catch(e){
        console.log(e);
    }
})
使用jest不需要导入包,直接就能用,以上的方法都比较直观
npm run test执行npm run test就能执行单元测试了
10.2 生命周期
import functions  from './sum';

beforeAll(()=>{
    console.log('beforeAll');
})
beforeEach(()=>{
    console.log('setUp');
})

describe('套餐走起',()=>{
    test('sum(2 + 2) 等于 4', () => {
        expect(functions.sum(2, 2)).toBe(4);
    })

    test('对象的深度比较,用toEqual', () => {
        expect(functions.getAuthor()).toEqual(functions.getAuthor());
    })
})

afterEach(()=>{
    console.log('tearDown');
})
afterAll(()=>{
    console.log('afterAll');
});
生命周期方法也比较简单,没啥好说的
10.3 UI测试
import React from 'react';

type ButtonProps = {
    title:string;
    onClick?:()=>void;
}
const Button:React.FC<ButtonProps> = (props)=>{

    return (<button onClick={props.onClick}>{props.title}</button>);
}

type ButtonList = {
    title:string;
    list:ButtonProps[]
}

const ButtonList:React.FC<ButtonList> = (props)=>{
    return (<div>
        <h2>{props.title}</h2>
        {props.list.map((single,index)=>{
            return (<Button key={index} {...single}/>);
        })}
    </div>);
}

export {
    Button,
    ButtonList
};
写两个UI组件
import React from 'react'
import Enzyme, { shallow ,render} from 'enzyme'
import Adapter from 'enzyme-adapter-react-16'
import toJson from 'enzyme-to-json'
import {Button,ButtonList} from './ui';

Enzyme.configure({ adapter: new Adapter() })


test('test1',()=>{
    //浅渲染
    const MyButton = shallow(<Button title={'按钮啊'}/>);

    //拿出text
    const buttonText = MyButton.text();

    expect(buttonText).toEqual('按钮啊');
})


test('test2',()=>{

    const myClick = jest.fn();
    //浅渲染
    const MyButton = shallow(<Button title={'按钮啊'} onClick={myClick}/>);

    //模拟事件点击
    MyButton.simulate('click');

    // 期望调用了这个方法
    expect(myClick).toHaveBeenLastCalledWith();
})

test('test3',()=>{
      //浅渲染
      const app = shallow(<ButtonList title="12" list={[
          {
              title:'button1',
          },
          {
              title:'button2',
          }
      ]}/>);

      //拿出text
      const buttonLength = app.find('button').length;

      expect(buttonLength).toEqual(0);
})

test('test4',()=>{
    //深渲染,只渲染为html
    const app = render(<ButtonList title="12" list={[
        {
            title:'button1',
        },
        {
            title:'button2',
        }
    ]}/>);

    //拿出text
    const buttonLength = app.find('button').length;

    expect(buttonLength).toEqual(2);
})

test('test5',()=>{
    //深渲染,只渲染为html
    const app = render(<ButtonList title="12" list={[
        {
            title:'button1',
        },
        {
            title:'button2',
        }
    ]}/>);

    expect(toJson(app)).toMatchSnapshot();
})shallow是浅渲染,render是深渲染,这两个方法都不需要DOM支持的。如果需要DOM支持的渲染,就需要jsdom的配合。
一般的测试方法就是find对象,然后toEqual就可以了。
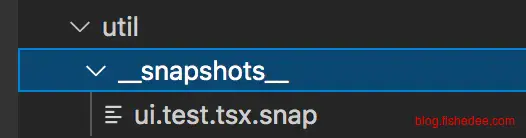
还有另外一种方法是使用snapShot测试,比较特别,它会在首次测试的时候,将结果输出到__snapshots__目录下。下次测试的时候,检查snapshots的结果是否一致,这种方法相当适合来做回归测试。
11 其他配置
11.1 devtool
devtool: 'none',11.2 external
// more config: https://d.umijs.org/config
// 配置 external
externals: {
    react: 'window.React',
    'react-dom': 'window.ReactDOM',
},

// 引入被 external 库的 scripts
// 区分 development 和 production,使用不同的产物
scripts: [
    'https://unpkg.com/react@16.14.0/umd/react.production.min.js',
    'https://unpkg.com/react-dom@16.14.0/umd/react-dom.production.min.js',
],
这个external比较有用,可以指定dev模式下使用React的production版本,从而更准确地测试性能。
11.3 targets
targets: {
    chrome: 79,
    firefox: false,
    safari: false,
    edge: false,
    ios: false,
},看这里,调整targets,能相应更改polyfill
FIXME,这里没成功,依然采用asyncGenerator,而不是浏览器原生的async/await
11.3 环境变量
umi中的部分配置从.umi文件移到了环境变量,具体配置项看这里
FORK_TS_CHECKER=1 umi dev打开TypeScript的类型检查,默认为不打开
COMPRESS=none umi dev打开不压缩css和js文件,默认为打开
12 FAQ
12.1 依赖不更新
我们有时候需要更新依赖,在umi中我们需要这样做:
- 修改package.json的依赖版本号
- 删除node_modules文件夹和package.json文件夹
- 删除src/.umi文件夹(这个经常被忽略,这个文件夹下缓存了依赖的内容)
- 重新执行npm install
以上的每一步缺一不可,否则依赖不会更新
12.2 调试依赖
如果我们需要在线调试依赖包,需要遵循以下的步骤
- 删除src/.umi文件夹
- 查看package.json的module项,例如为”module”: “dist/index.esm.js”,那么修改index.esm.js文件即可
- 重新执行npm start
每次修改node_modules的文件都需要执行以上的步骤,否则依赖可能不更新
13 总结
在umi中,我学到最多的是关于怎么设计一个好用的工具:
- npm create xxx && npm install的初始化方式,这样能快速开启一个脚手架,并且又允许用户修改其中一部分的依赖
- 约定式的路由,Umi使用用户输入的文件,再生成routes文件,最后再去webpack打包,这个方法省事
- 组件的属性,应该在组件的文件中设置title,而不是需要用户跑到另外一个文件来设置这个文件的title属性。
- 路由的配置设计,React-Router的路由方便,但真的不太好用,因为不是json格式,不容易被后端再加工。Umi的路由配置同时支持了layou与wrapper,挺省事的
- 成熟的工程经验积累,像js打包混淆,自动化分包,css模块化,TypeScript自动转换,这些都是成熟的工程经验积累,对于Umi来说,大部分都已经默认打开了,用户不需要再配置,这样确实是方便。
- useLocation,useRouteMatch的设计也很好,可以跨组件拉到这个数据,而且是强类型的,开发更加安全可靠
- 本文作者: fishedee
- 版权声明: 本博客所有文章均采用 CC BY-NC-SA 3.0 CN 许可协议,转载必须注明出处!