0 概述
微信小程序开发经验汇总
官方文档在这里
tdesign的文档在这里
感觉:
- 微信小程序的坑比较多,开发工具做得比较松散,报错了不容易找到问题
- 整体UI框架设计也比较松散,不像Vue,也不像React
- 在商业上非常成功
1 快速入门
代码在这里
1.1 下载工具
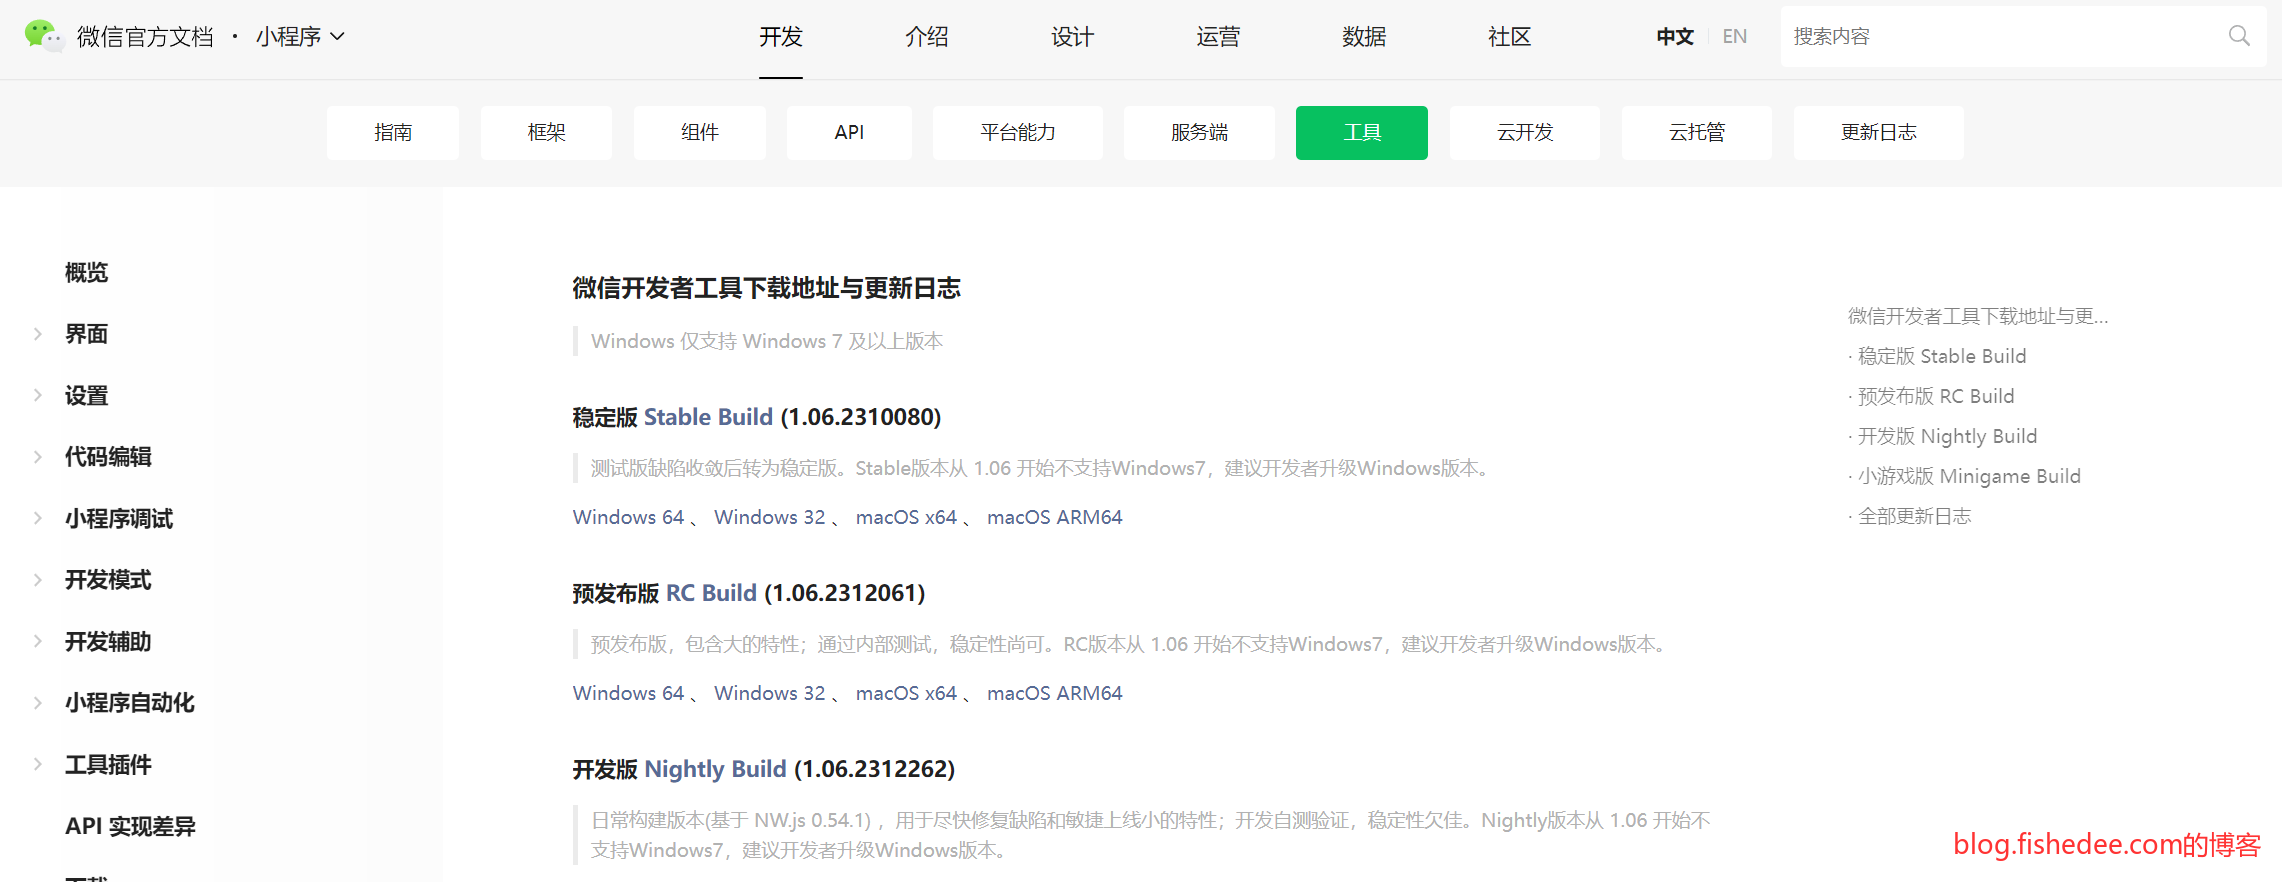
到这里直接下载工具就可以了
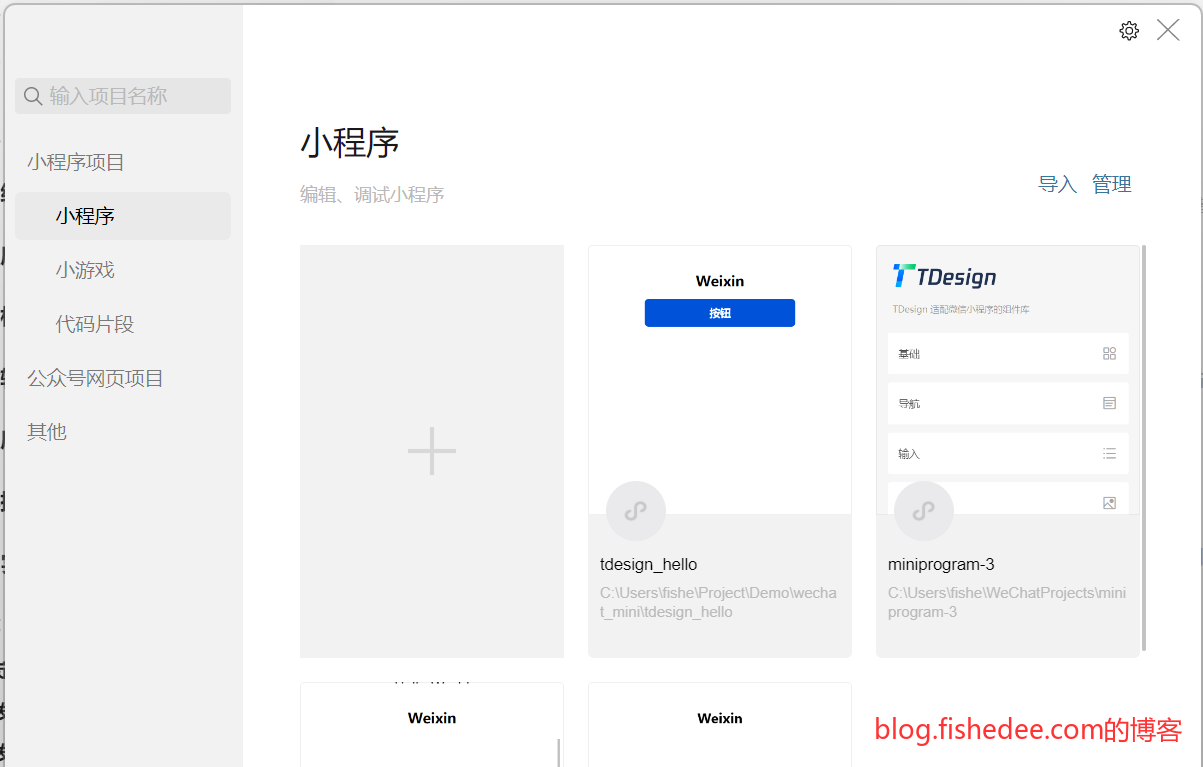
1.2 新建项目
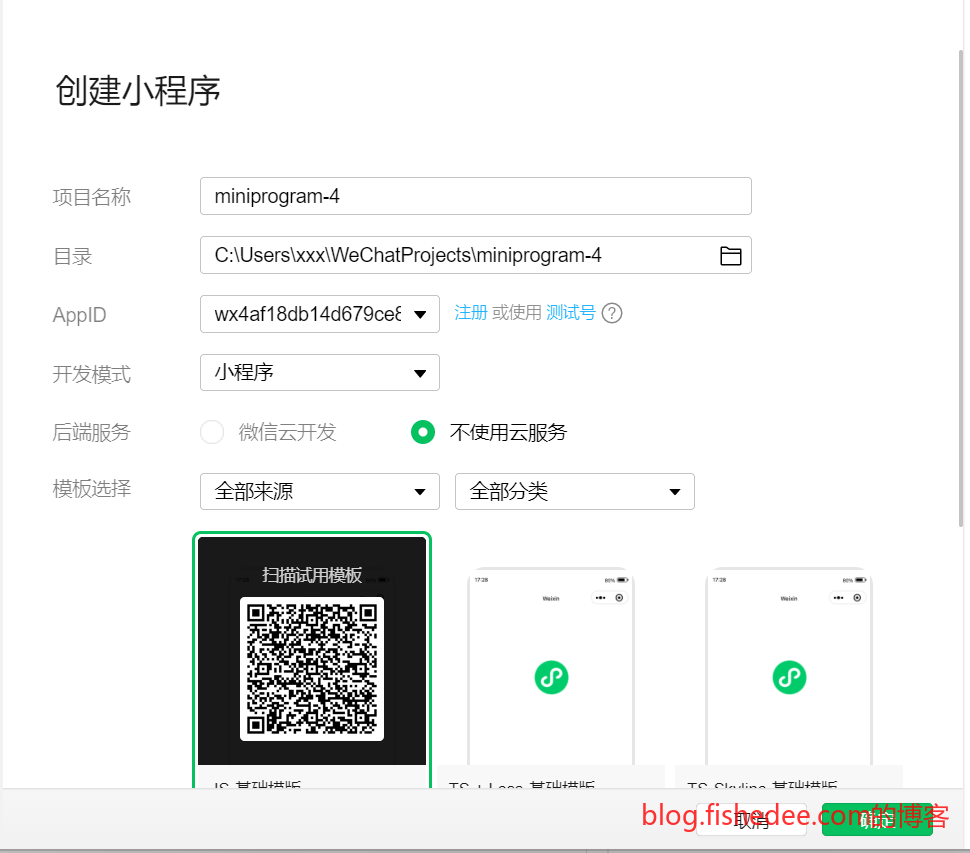
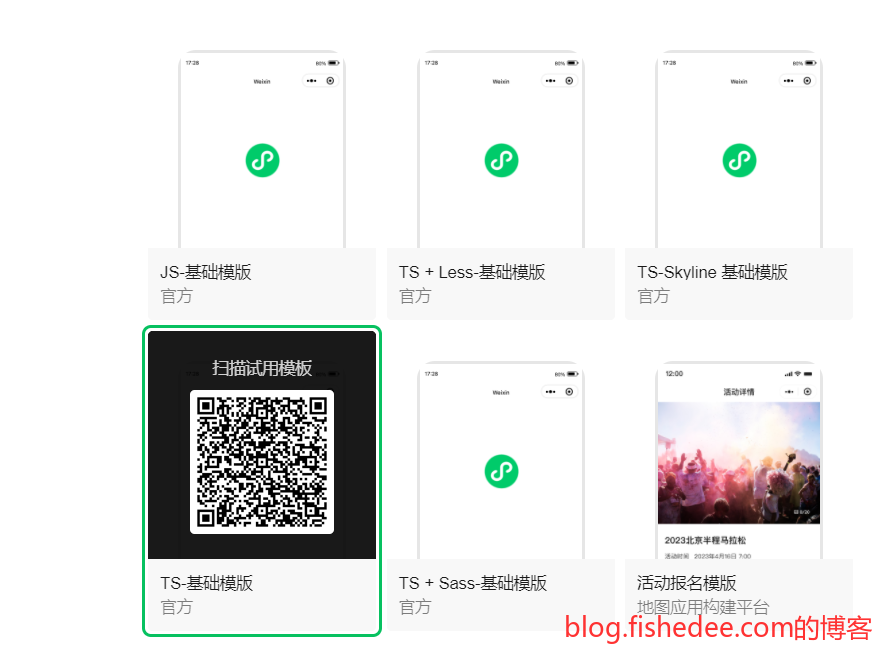
新建项目,选择测试号的AppId,我选择了TS-基础模板
1.3 源代码
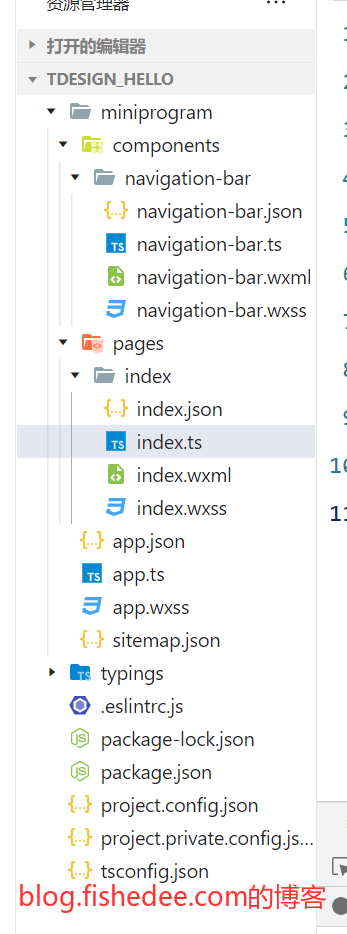
1.3.1 目录结构
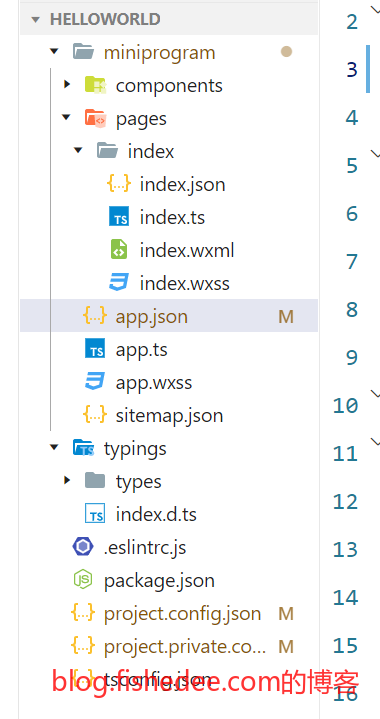
这是默认生成的目录结构
- project.config.json,项目编译配置
- miniprogram/app.json, App渲染配置
- miniprogram/pages,页面渲染配置
1.3.2 project.config.json
{
  "description": "项目配置文件",
  "miniprogramRoot": "miniprogram/",
  "compileType": "miniprogram",
  "setting": {
    "useCompilerPlugins": [
      "typescript"
    ],
    "babelSetting": {
      "ignore": [],
      "disablePlugins": [],
      "outputPath": ""
    },
    "coverView": false,
    "postcss": false,
    "minified": false,
    "enhance": false,
    "showShadowRootInWxmlPanel": false,
    "packNpmRelationList": [],
    "ignoreUploadUnusedFiles": true,
    "compileHotReLoad": false,
    "skylineRenderEnable": true
  },
  "simulatorType": "wechat",
  "simulatorPluginLibVersion": {},
  "condition": {},
  "srcMiniprogramRoot": "miniprogram/",
  "editorSetting": {
    "tabIndent": "insertSpaces",
    "tabSize": 2
  },
  "libVersion": "2.32.3",
  "packOptions": {
    "ignore": [],
    "include": []
  },
  "appid": "wx4af18db14d679ce8"
}
注释:
- miniprogramRoot,指定了App源代码的根目录
- useCompilerPlugins,使用typescript结构
- editorSetting,编辑器的配置
1.3.3 app代码
{
  "pages": [
    "pages/index/index"
  ],
  "window": {
    "navigationBarTextStyle": "black",
    "navigationStyle": "custom"
  },
  "style": "v2",
  "rendererOptions": {
    "skyline": {
      "defaultDisplayBlock": true,
      "disableABTest": true,
      "sdkVersionBegin": "3.0.0",
      "sdkVersionEnd": "15.255.255"
    }
  },
  "componentFramework": "glass-easel",
  "sitemapLocation": "sitemap.json",
  "lazyCodeLoading": "requiredComponents"
}app.json,文档看这里:
- pages,包含的页面数量,以及路由位置
- window,style,rendererOptions,渲染配置,可以看Skyline
- app.json,也可以引入全局组件。
// app.ts
App<IAppOption>({
  globalData: {},
  onLaunch() {
  },
})
app.ts,全局app配置
/**app.wxss**/
.container {
  height: 100%;
  display: flex;
  flex-direction: column;
  align-items: center;
  justify-content: space-between;
  padding: 200rpx 0;
  box-sizing: border-box;
}
app.wxss, 全局样式配置
{
  "desc": "关于本文件的更多信息,请参考文档 https://developers.weixin.qq.com/miniprogram/dev/framework/sitemap.html",
  "rules": [{
  "action": "allow",
  "page": "*"
  }]
}sitemap.json,内容索引配置,看这里
1.3.4 index代码
{
  "usingComponents": {
    "navigation-bar": "/components/navigation-bar/navigation-bar"
  }
}index.json,页面配置,声明本页面所依赖的组件。可以看这里
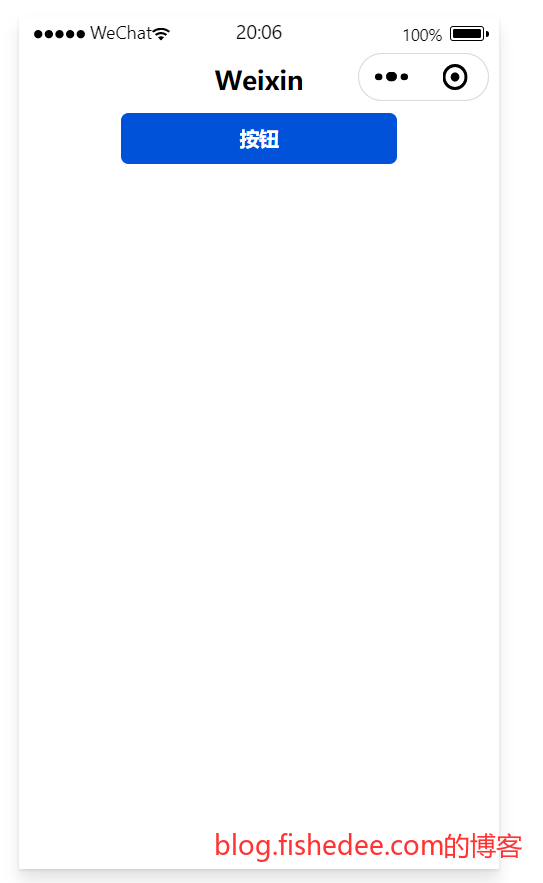
<navigation-bar title="Weixin" back="{{false}}" color="black" background="#FFF"></navigation-bar>
<view>{{ msg }}</view>
<button bindtap="clickMe">点击我</button>
index.wxml, 一个简单的页面配置
index.wxss, 样式为空
Page({
    data:{
        msg:'init',
    },
    clickMe: function() {
      this.setData({ msg: "Hello World" })
    }
})index.ts,一个较简单的逻辑,看这里
1.5 运行
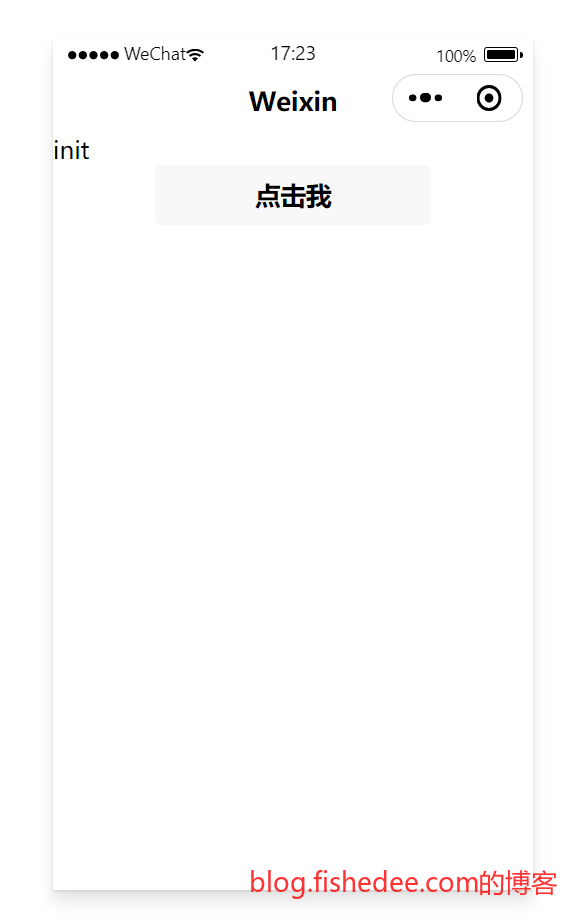
启动后的结果
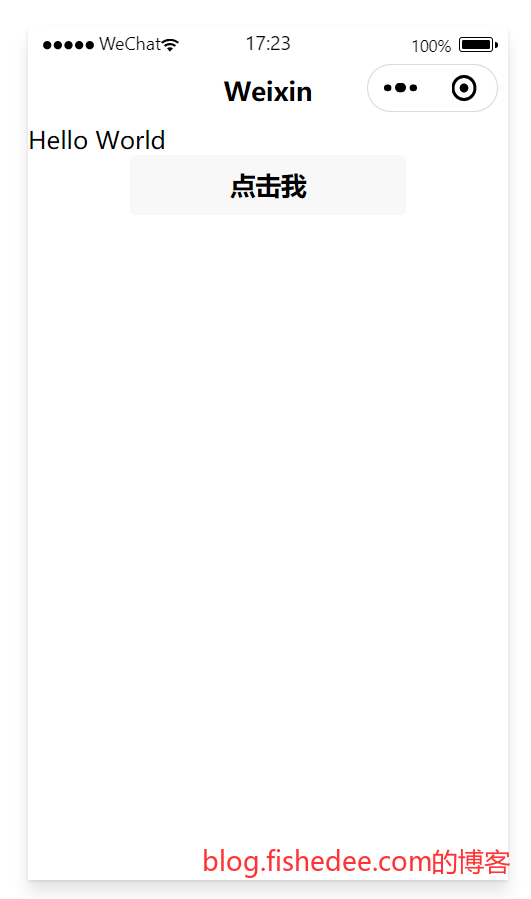
点击后的结果,相当简单了
2 TDesign组件
tdesign的文档在这里
注意,tdesign和vant并不支持”skyline”渲染器,请谨慎使用,在实际测试中,popup的内容都是错的。看这里
2.1 安装依赖
代码在这里
npm i tdesign-miniprogram -S --production先从npm安装依赖,注意是在项目的根目录
"setting": {
    "packNpmManually": true,
    "packNpmRelationList": [
        {
        "packageJsonPath": "./package.json",
        "miniprogramNpmDistDir": "./miniprogram/"
        }
} 在project.config.json的文件中,加入以上的配置。这是因为在默认的小程序中,只支持在miniprogram的目录中加入依赖,不支持在项目根目录加入依赖,看小程序的npm支持

选择,项目,重新打开此项目
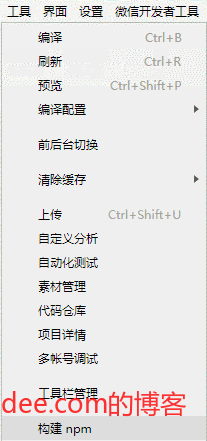
选择,工具,构建npm
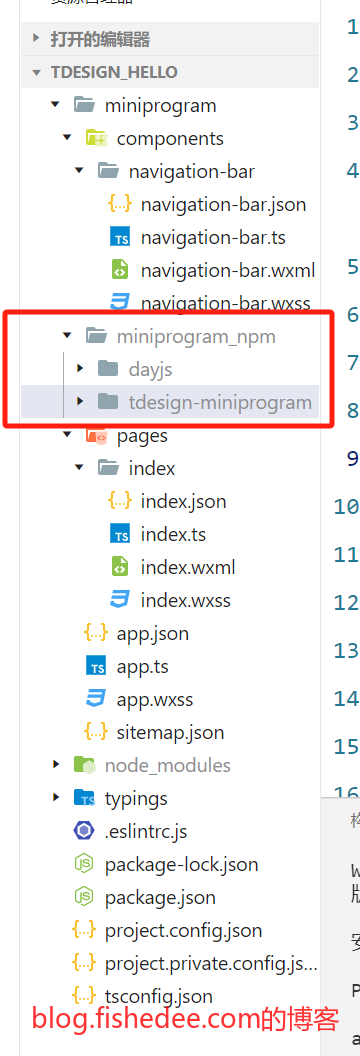
这个时候,成功的话会出现miniprogram_npm文件夹
{
  "pages": [
    "pages/index/index"
  ],
  "window": {
    "navigationBarTextStyle": "black",
    "navigationStyle": "custom"
  },
  //"style": "v2",
}
删除app.json文件中,关于style:v2的描述,否则部分Tdesign组件渲染不正确。
2.2 测试代码
{
  "usingComponents": {
    "navigation-bar": "/components/navigation-bar/navigation-bar",
    "t-button": "tdesign-miniprogram/button/button"
  }
}
在index.json中,声明依赖
<!--index.wxml-->
<navigation-bar title="Weixin" back="{{false}}" color="black" background="#FFF"></navigation-bar>
<t-button theme="primary">按钮</t-button>
在index.wxml中,使用tdesign的组件
/**index.wxss**/
page {
  height: 100vh;
  display: flex;
  flex-direction: column;
}
在index.wxss的样式
// index.ts
// 获取应用实例
const app = getApp<IAppOption>()

Component({
  data: {
  },
  methods: {
  },
})
没啥用的index.ts文件
2.3 编译报错
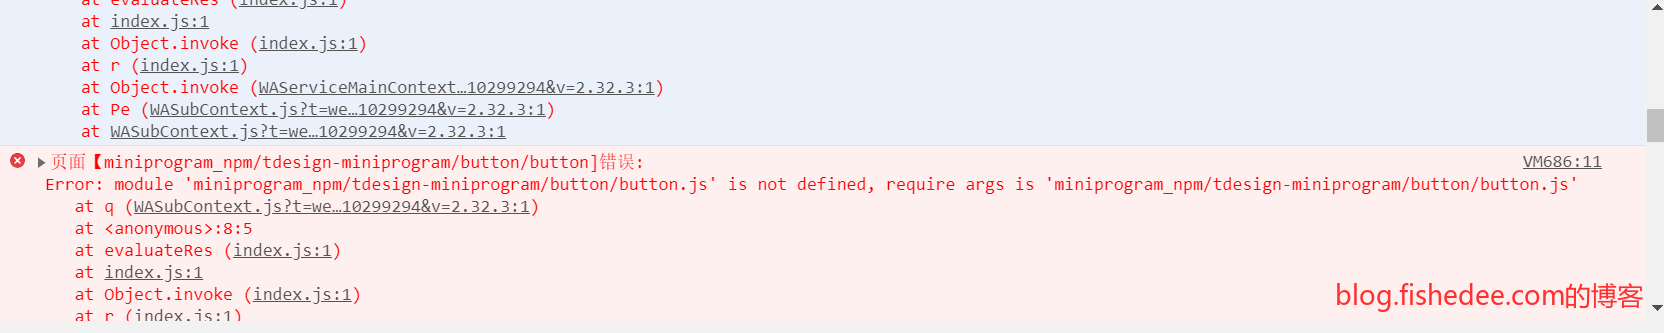

页面【miniprogram_npm/tdesign-miniprogram/button/button]错误:
 Error: module 'miniprogram_npm/tdesign-miniprogram/button/button.js' is not defined, require args is 'miniprogram_npm/tdesign-miniprogram/button/button.js'
如果页面没有样式,或者报tdesign的组件找不到的错误,这是因为tdesign的es6文件没有转换为es5文件导致的。
{
  "description": "项目配置文件",
  "miniprogramRoot": "miniprogram/",
  "compileType": "miniprogram",
  "setting": {
    "useCompilerPlugins": [
      "typescript"
    ],
    "babelSetting": {
      "ignore": [],
      "disablePlugins": [],
      "outputPath": ""
    },
    "coverView": false,
    "postcss": false,
    "minified": false,
    "es6": true,
    "enhance": true,
    "showShadowRootInWxmlPanel": false,
    "ignoreUploadUnusedFiles": true,
    "compileHotReLoad": false,
    "skylineRenderEnable": true,
    "packNpmManually": true,
    "packNpmRelationList": [
      {
        "packageJsonPath": "./package.json",
        "miniprogramNpmDistDir": "./miniprogram/"
      }
    ]
  },
  "simulatorType": "wechat",
  "simulatorPluginLibVersion": {},
  "condition": {},
  "srcMiniprogramRoot": "miniprogram/",
  "editorSetting": {
    "tabIndent": "insertSpaces",
    "tabSize": 2
  },
  "libVersion": "2.32.3",
  "packOptions": {
    "ignore": [],
    "include": []
  },
  "appid": "wx4af18db14d679ce8"
}
在project.config.json文件中,打开es6或者打开enhance开关即可。
2.4 运行
这次运行就正常了
3 自定义组件
代码在这里
3.1 定义组件
{
  "component": true,
  "usingComponents": {}
}
my-image.json,需要打开component开关
<view class="wrapper">
    <image class="img" src="{{img}}" mode='aspectFill'/>
    <block wx:if="{{header || description}}" >
    <view class="body" bind:tap="onBodyTap">
            <text class="header">{{header}}</text>
            <text class="description">{{description}}</text>
    </view>
    </block>
    <block wx:else>
        <slot name="body"></slot>
    </block>
</view>
定义组件xml
/* components/my-image/my-image.wxss */
.wrapper{
    display:flex;
    flex-direction: row;
    gap:20rpx;
    padding:20rpx;
    border-bottom:1px solid #ddd;
}

.img{
    width:200rpx;
    height:200rpx;
    border:1px solid #ddd;
}

.body{
    display:flex;
    flex-direction:column;
    gap:20rpx;
    flex:1;
}

.header{
    font-size:16 px;
    color:red;
}

.description{
    font-size:12px;
    color:black;
}
定义css
// components/my-image/my-image.ts
Component({
    options: {
        multipleSlots: true // 在组件定义时的选项中启用多slot支持
    },
    /**
     * 组件的属性列表
     */
    properties: {
        img:{
            type:String,
            value:'https://mmbiz.qpic.cn/mmbiz/icTdbqWNOwNRna42FI242Lcia07jQodd2FJGIYQfG0LAJGFxM4FbnQP6yfMxBgJ0F3YRqJCJ1aPAK2dQagdusBZg/0'
        },
        header:{
            type:String,
            value:'',
        },
        description:{
            type:String,
            value:'',
        }
    },
    /**
     * 组件的初始数据
     */
    data: {

    },

    /**
     * 组件的方法列表
     */
    methods: {
        onBodyTap:function(){
            console.log("my-image tap body");
            var myEventDetail = {
                hello:1,
            } // detail对象,提供给事件监听函数
            this.triggerEvent('myevent',myEventDetail,{
                bubbles:undefined,//事件是否冒泡
                composed:undefined,//事件是否可以穿越组件边界,为false时,事件将只能在引用组件的节点树上触发,不进入其他任何组件内部,
                capturePhase:undefined,//事件是否拥有捕获阶段
            })
        }
    }
})
要点:
- multipleSlots,是为了在组件中可以使用名称来引入父组件。
- properties,定义了组件的输入参数
- onBodyTap,是响应了body的tap事件,然后使用triggerEvent来通知父组件。
3.2 使用组件
{
  "usingComponents": {
    "navigation-bar": "/components/navigation-bar/navigation-bar",
    "my-image":"/components/my-image/my-image"
  }
}
index.json,在usingComponents中定义要引入的组件。
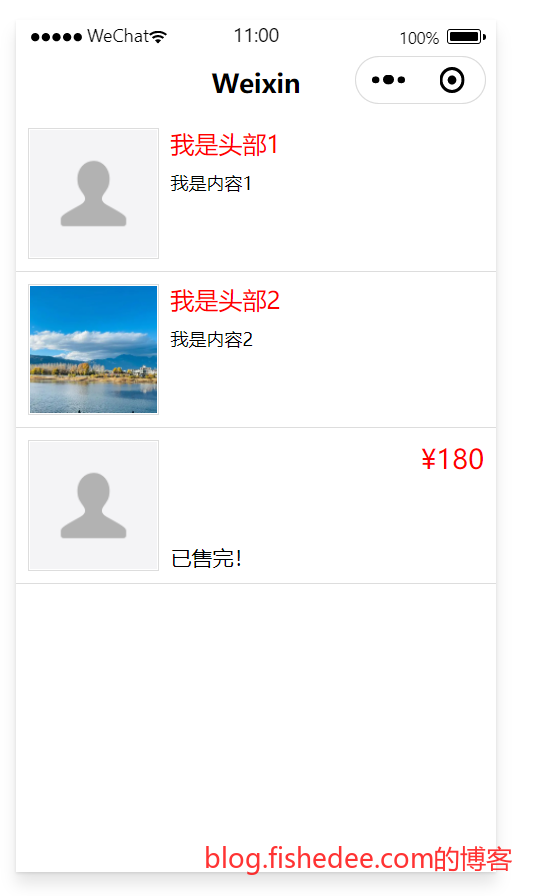
<!--index.wxml-->
<navigation-bar title="Weixin" back="{{false}}" color="black" background="#FFF"></navigation-bar>
<scroll-view class="scrollarea" scroll-y type="list">
    <my-image header="我是头部1" description="我是内容1" bind:myevent="onTap1"/>
    <my-image img="https://img0.baidu.com/it/u=1678524518,3262908896&fm=253&fmt=auto&app=138&f=JPEG?w=667&h=500" header="我是头部2" description="我是内容2" bind:myevent="onTap2"/>
    <my-image>
        <view slot="body" class="my_body" bind:tap="onTap3">
            <text class="my_body_header">已售完!</text>
            <text class="my_body_body">¥180</text>
        </view>
    </my-image>
</scroll-view>
index.wxml,直接使用组件。
- 第三个my-image中关于引入自定义子组件的用法,slot=“body”。
- my-image使用bind:myevent来响应自定义事件
// index.ts
// 获取应用实例

Component({
  data: {
  },
  methods: {
    // 事件处理函数
    onTap1() {
      console.log("page tap first item");
    },
    onTap2() {
        console.log("page tap second item");
    },
    onTap3() {
        console.log("page tap third item");
    },
  },
})
代码本身就比较简单了
3.3 运行
代码也比较简单的了
4 系统接口
代码在这里
参考文档:
4.1 网络
{
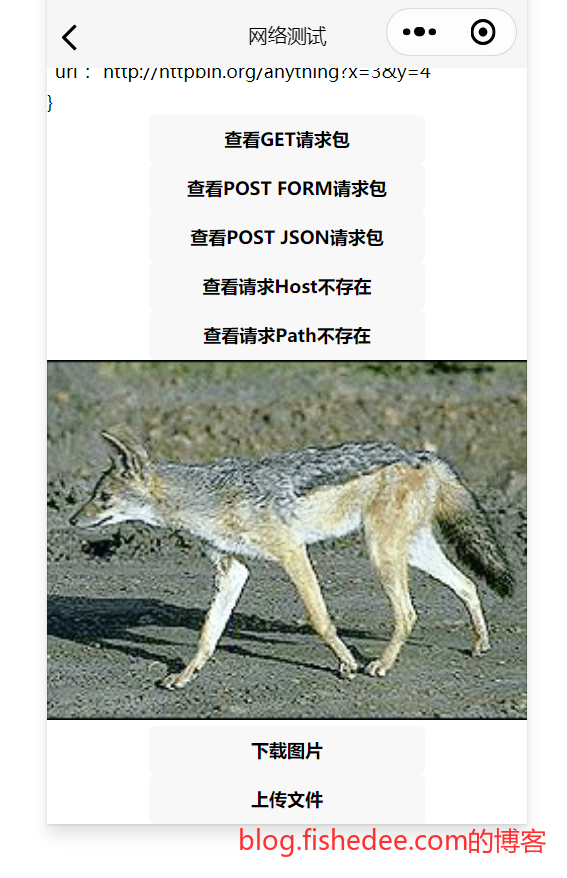
"navigationBarTitleText": "网络测试"
}network.json
<!--index.wxml-->
<scroll-view class="scrollarea" scroll-y type="list">
    <text>{{content}}</text>
    <button bind:tap="onRequestGet">查看GET请求包</button>
    <button bind:tap="onRequestPostForm">查看POST FORM请求包</button>
    <button bind:tap="onRequestPostJson">查看POST JSON请求包</button>
    <button bind:tap="onRequestHostError">查看请求Host不存在</button>
    <button bind:tap="onRequestPathError">查看请求Path不存在</button>
    <image src="{{image}}" mode="aspectFill"/>
    <button bind:tap="onDownloadFile">下载图片</button>
    <button bind:tap="onUploadFile">上传文件</button>
</scroll-view>
network.wxml
/**index.wxss**/
page {
  height: 100vh;
  display: flex;
  flex-direction: column;
}

text{
    font-size:12px;
}

button{
    font-size:12px;
}
network.wxss
// index.ts
// 获取应用实例
const app = getApp<IAppOption>()
const defaultAvatarUrl = 'https://mmbiz.qpic.cn/mmbiz/icTdbqWNOwNRna42FI242Lcia07jQodd2FJGIYQfG0LAJGFxM4FbnQP6yfMxBgJ0F3YRqJCJ1aPAK2dQagdusBZg/0'

Component({
    data: {
        content:'内容1',
    },
    methods: {
    onRequestGet(){
        const top = this;
        wx.request({
            method:'GET',
            url:'http://httpbin.org/anything',
            data:{
                x:3,
                y:4,
            },
            dataType:'其他',
            success(res){
                console.log('statusCode',res.statusCode);
                top.setData({
                    content:res.data+'',
                });
            }
        });
    },
    onRequestPostForm(){
        const top = this;
        wx.request({
            method:'POST',
            url:'http://httpbin.org/anything',
            data:{
                x:3,
                y:4,
            },
            header:{
                'content-type':'application/x-www-form-urlencoded',
            },
            dataType:'其他',
            success(res){
                console.log('statusCode',res.statusCode);
                top.setData({
                    content:res.data+'',
                });
            }
        });
    },
    onRequestPostJson(){
        const top = this;
        wx.request({
            method:'POST',
            url:'http://httpbin.org/anything',
            data:{
                x:3,
                y:4,
            },
            header:{
                'content-type':'applicationjson',
            },
            dataType:'其他',
            success(res){
                console.log('statusCode',res.statusCode);
                top.setData({
                    content:res.data+'',
                });
            }
        });
    },
    onRequestHostError(){
        wx.request({
            method:'POST',
            url:'https://error_cc/',
            data:{
                x:3,
                y:4,
            },
            header:{
                'content-type':'applicationjson',
            },
            dataType:'其他',
            success(res){
                console.log('success res',res);
            },
            fail(res){
                //fail报错,res为对象{errMsg: "request:fail "}
                console.log('fail res',res);
            }
        });
    },
    onRequestPathError(){
        wx.request({
            method:'POST',
            url:'https://httpbin.org/ccc',
            data:{
                x:3,
                y:4,
            },
            header:{
                'content-type':'applicationjson',
            },
            dataType:'其他',
            success(res){
                //success报错,rs.statusCode为404
                console.log('success res',res);
            },
            fail(res){
                console.log('fail res',res);
            }
        });
    },
    onDownloadFile(){
        const top = this;
        //下载文件
        wx.downloadFile({
            url: 'https://httpbin.org/image/jpeg',
            success (res) {
                if (res.statusCode === 200) {
                    var base64 = 'data:image/jpeg;base64,'+wx.getFileSystemManager().readFileSync(res.tempFilePath, "base64");
                    top.setData({
                        image:base64,
                    });
                }
            }
        })
    },
    onUploadFile(){
        const top = this;
        console.log('start upload image');
        wx.chooseMedia({
            count:1,
            mediaType:['image'],
            success (res) {
              const tempFilePaths = res.tempFiles;
            top.setData({
                image:tempFilePaths[0].tempFilePath,
            });
              wx.uploadFile({
                url: 'https://httpbin.org/anything',
                filePath: tempFilePaths[0].tempFilePath,
                name: 'file',
                formData: {
                  'user': 'test'
                },
                success (res){
                    console.log('res',res);
                    top.setData({
                        content:'upload success'
                    });
                }
              })
            }
          })
    }
},
})
network.ts, 要点:
- 使用wx.request来进行网络请求,method是方法。data根据method和content-type来自动变化的。method为GET的时候,data是url参数。method为POST的时候,data就是对应的请求body体
- 使用wx.downloadFile来下载文件。这里也使用了readFileSync来转换base64,然后直接放到image标签来显示。
- 使用wx.uploadFile来上传文件。注意,请求格式只能为content-type 为 multipart/form-data。
运行结果也比较简单
4.2 图片
{
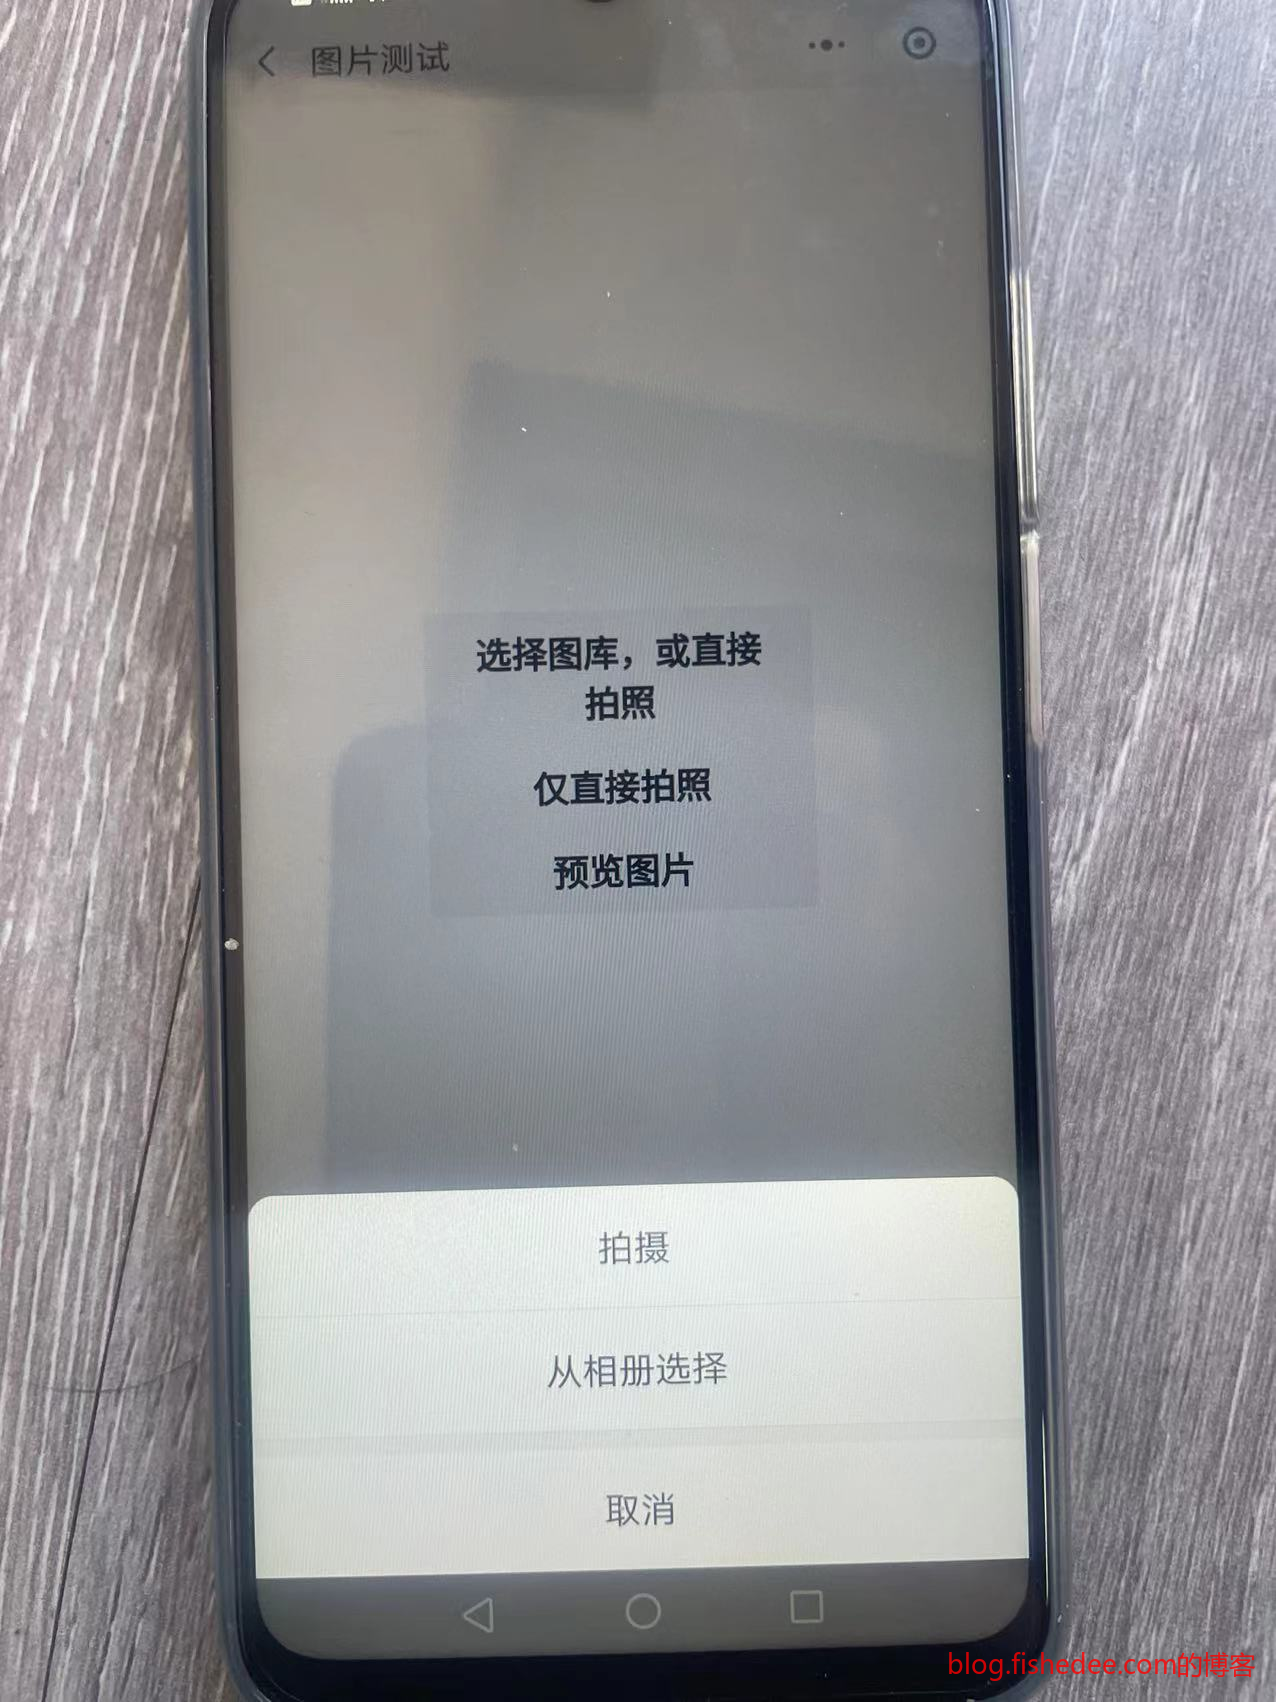
"navigationBarTitleText": "图片测试"
}timage.json,配置文件
<!--index.wxml-->
<scroll-view class="scrollarea image" scroll-y type="list">
    <image src="{{image}}" mode="aspectFill"/>
    <button bind:tap="onSelectImage">选择图库,或直接拍照</button>
    <button bind:tap="onCameraImage">仅直接拍照</button>
    <button bind:tap="onPreviewImage">预览图片</button>
</scroll-view>
timage.wxml,渲染页面
/* pages/image/image.wxss */timage.wxss, 空的
// pages/image/image.ts
Component({

    /**
     * 组件的属性列表
     */
    properties: {

    },

    /**
     * 组件的初始数据
     */
    data: {
        image:""
    },

    /**
     * 组件的方法列表
     */
    methods: {
        onSelectImage(){
            const top = this;
            wx.chooseMedia({
                count:1,
                mediaType:['image'],
                success (res) {
                    const tempFilePaths = res.tempFiles;
                    top.setData({
                        image:tempFilePaths[0].tempFilePath,
                    });
                }
            })
        },
        onCameraImage(){
            const top = this;
            wx.chooseMedia({
                count:1,
                mediaType:['image'],
                sourceType:['camera'],
                success (res) {
                    const tempFilePaths = res.tempFiles;
                    top.setData({
                        image:tempFilePaths[0].tempFilePath,
                    });
                }
            })
        },
        onPreviewImage(){
            wx.previewImage({
                current: '', // 当前显示图片的http链接
                urls: [
                    'https://i1.hdslb.com/bfs/archive/cba282edcc41b3a018f1651130907c2f93e17c5b.jpg',
                    'https://gimg2.baidu.com/image_search/src=http%3A%2F%2Fsafe-img.xhscdn.com%2Fbw1%2F0d6be749-99be-447e-a8be-b71116b532e4%3FimageView2%2F2%2Fw%2F1080%2Fformat%2Fjpg&refer=http%3A%2F%2Fsafe-img.xhscdn.com&app=2002&size=f9999,10000&q=a80&n=0&g=0n&fmt=auto?sec=1706756478&t=4ca3fed137241dc66333378926ffc859',
                    'https://img1.baidu.com/it/u=1279840328,315377675&fm=253&fmt=auto&app=138&f=JPEG?w=750&h=500',
                ]
              })
        }
    }
})
timage.ts,要点:
- 使用wx.chooseMedia来选择图片,默认会弹出选择图库,直接拍照的两种选项。
- 使用wx.chooseMedia的sourceType为camera的时候,就会只能选择拍照的选项。
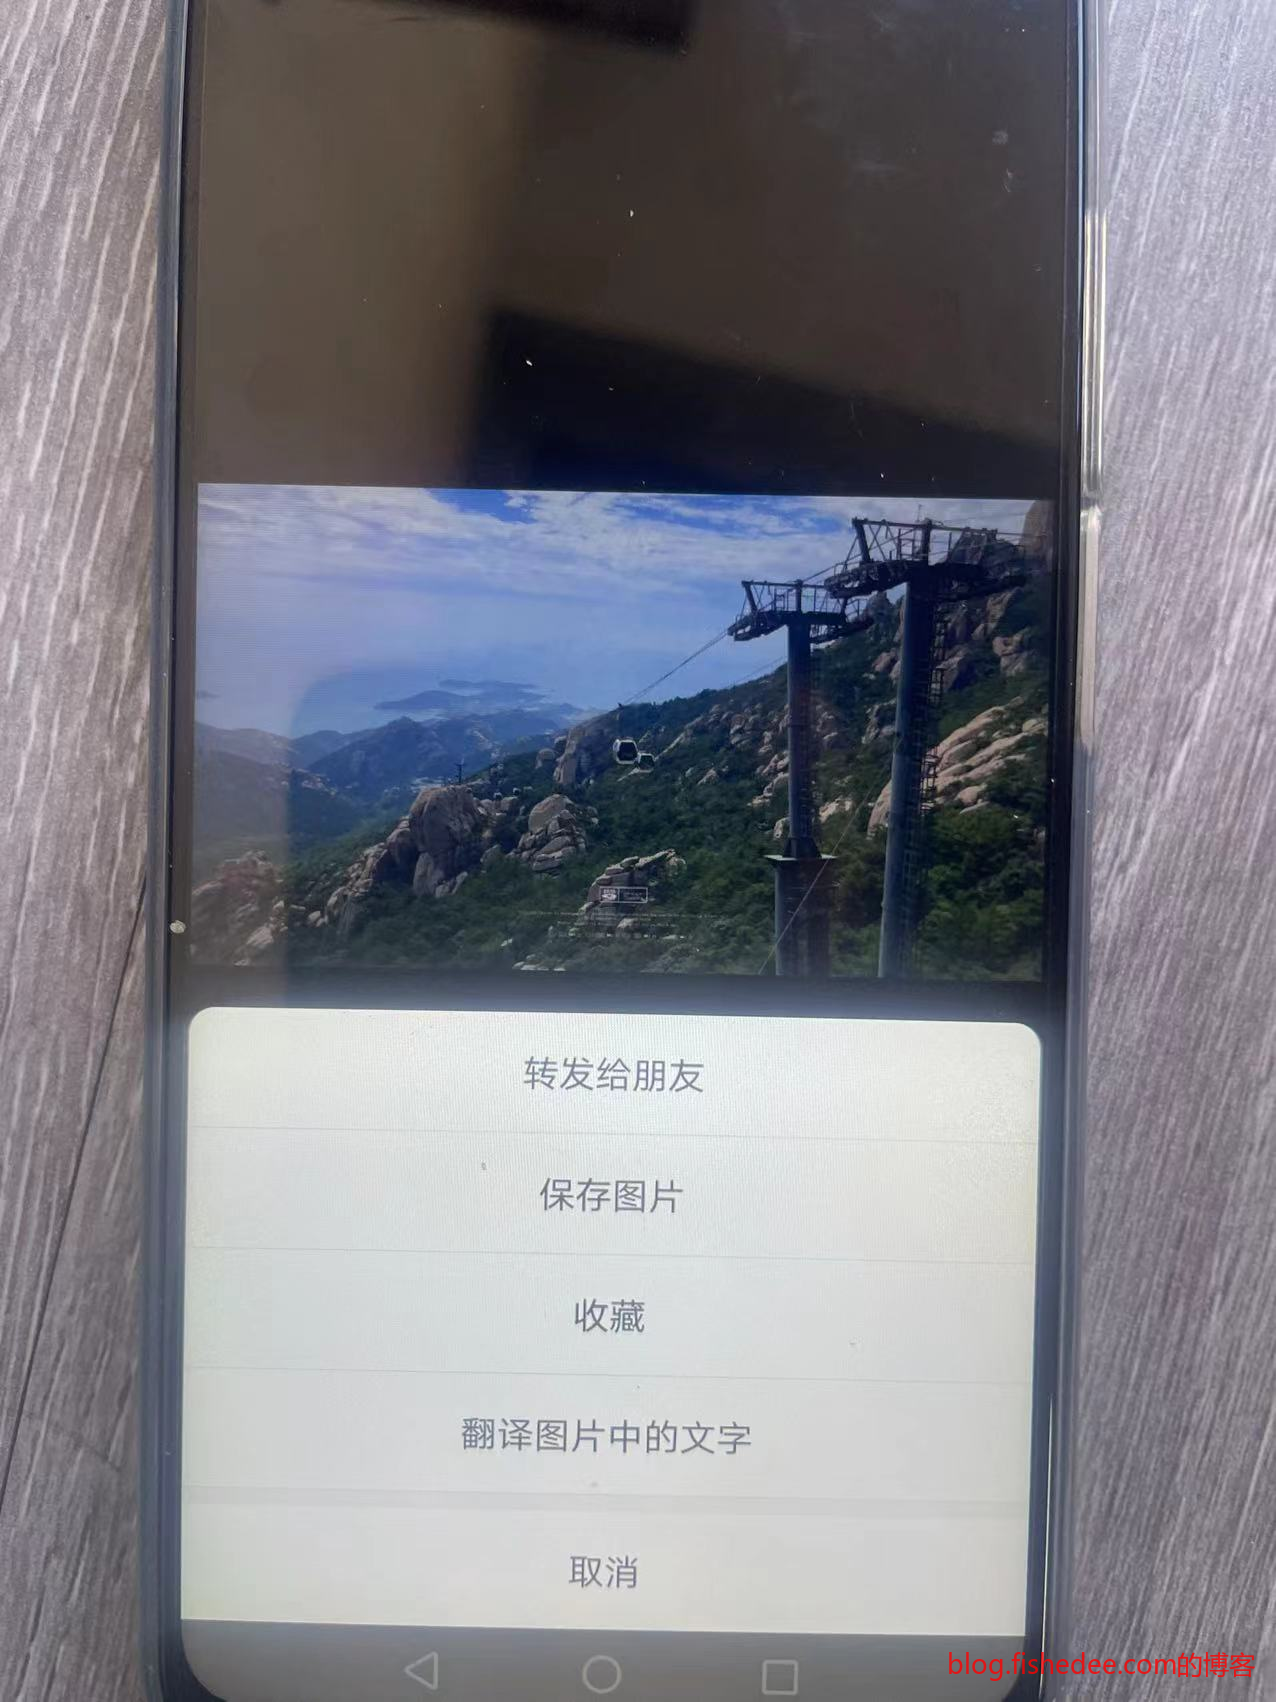
- 使用wx.previewImage能直接预览多个图片,在预览的过程中,可以长按保存图片。
运行也比较简单
4.3 持久化
{
    "navigationBarTitleText": "持久化测试"
}
tpersist.json,配置文件
<!--index.wxml-->
<scroll-view
    class="scrollarea tpersist"
    scroll-y
    type="list"
    bindrefresherrefresh="onPullDownRefresh">
  <view class="todoItem" wx:for="{{todos}}" wx:key="id" wx:for-item="todo">
    <block wx:if="{{todo.isEdit}}">
        <input
            id="{{todo.id}}"
            class="todoBody"
            placeholder="请输入"
            value="{{todo.editText}}"
            auto-focus="{{true}}"
            confirm-type="done"
            bindconfirm="onConfirmEdit"/>
        <view class="todoButtonGroup">
            <button
                id="{{todo.id}}"
                bind:tap="onCancelEdit">取消</button>
        </view>
    </block>
    <block wx:else>
        <text class="todoBody">{{todo.text}}</text>
        <view class="todoButtonGroup">
            <button
                id="{{todo.id}}"
                bind:tap="onStartEdit">编辑</button>
            <button
                id="{{todo.id}}"
                bind:tap="onDel">删除</button>
        </view>
    </block>
  </view>
</scroll-view>
<button class="add" bind:tap="onAdd">添加todo</button>
tpersist.wxml,简单的todo页面渲染
/* pages/tcache.wxss */
.tpersist{
    flex:1;
    height:calc(100vh - 40px);
}
.todoItem{
    display: flex;
    flex-direction: row;
    padding:20rpx;
    border-bottom:1px solid #DDD;
    align-items: center;
}

.todoItem:first-child{
    border-top:1px solid #DDD;
}

.todoBody{
    flex:1;
}

.todoButtonGroup{
    display: flex;
    flex-direction:row;
    gap:5rpx;
}

.todoButtonGroup button{
    width:150rpx;
    font-size:14px;
    padding-left:5rpx;
    padding-right:5rpx;
}

.add{
    margin-top:10rpx;
}
tpersist.wxss
// pages/tcache.ts
type TodoData = {
    id:string;
    isEdit:boolean;
    text:string;
    editText:string;
}
let globalId = 10001;
const myapp = getApp<IAppOption>()

const initData:TodoData[] = [];
for( let i = 0 ;i != 10;i++){
    initData.push({
        id:(globalId++)+'',
        isEdit:false,
        text:`task_${i+1}`,
        editText:'',
    });
}

Component({

    /**
     * 组件的属性列表
     */
    properties: {

    },

    /**
     * 组件的初始数据
     */
    data: {
        todos:initData,
        windowHeight:myapp.globalData.systemInfo!.windowHeight,
        triggered:false as boolean,
    },

    lifetimes:{
        attached(){
            this.readData();
        }
    },
    /**
     * 组件的方法列表
     */
    methods: {
        refresh(){
            this.setData({
                todos:this.data.todos,
            });
        },
        saveData(){
            const value = JSON.stringify(this.data.todos);
            //异步方法,这里不需要等待
            wx.setStorage({
                key:'todos',
                data:value,
            });
        },
        async readData(){
            try{
                let data = await wx.getStorage({
                    key:'todos'
                });
                this.data.todos = JSON.parse(data.data);
                this.refresh();
            }catch(e){
                console.error('cache is empty',e);
            }
        },
        findToDo(id:string):TodoData|undefined{
            const targetIndex = this.data.todos.findIndex(single=>{
                return single.id == id;
            })
            if( targetIndex != -1 ){
                return this.data.todos[targetIndex];
            }
            return undefined;
        },
        onStartEdit(event:any){
            console.log('startEdit',event);
            const todo = this.findToDo(event.currentTarget.id);
            if( todo){
                todo.isEdit = true;
                todo.editText = todo.text;
            }
            this.refresh();
        },
        onConfirmEdit(event:any){
            const todo = this.findToDo(event.currentTarget.id);
            if( todo){
                todo.isEdit = false;
                todo.text = event.detail.value;
            }
            this.refresh();
            this.saveData();
        },
        onCancelEdit(event:any){
            const todo = this.findToDo(event.currentTarget.id);
            if( todo){
                todo.isEdit = false;
            }
            this.refresh();
        },
        onDel(event:any){
            const newTodos = this.data.todos.filter(single=>{
                return single.id != event.currentTarget.id;
            })
            this.data.todos = newTodos;
            this.refresh();
            this.saveData();
        },
        onAdd(){
            const todo:TodoData = {
                id:(globalId++)+'',
                isEdit:false,
                text:'',
                editText:'',
            }
            this.data.todos.push(todo);
            this.refresh();
            this.saveData();
        }
    }
})
使用setStorage和getStorage来异步写入和读取缓存,比较简单直接
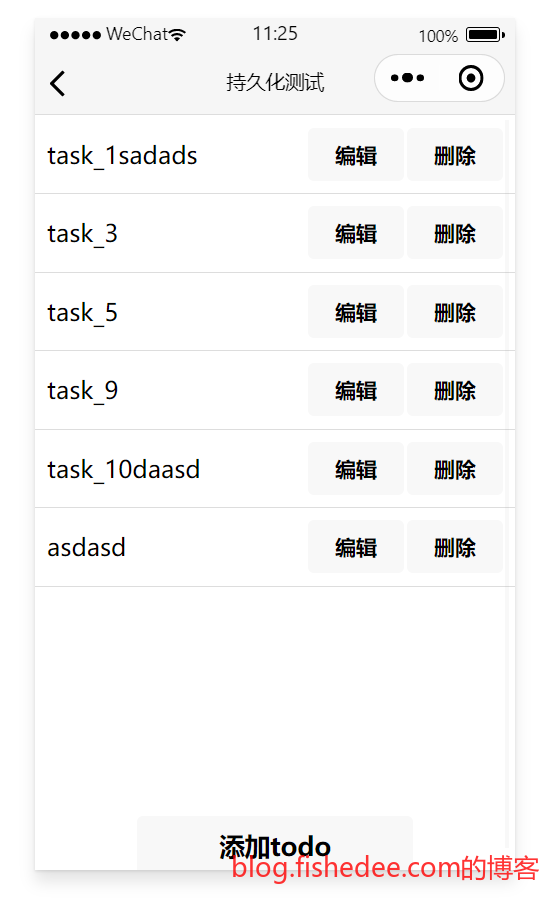
运行页面也很简单
5 UI组件
代码在这里
参考文档:
官方文档有很多实用的demo,可以参考一下
5.1 scroll-view
{
  "disableScroll": true,
  "renderer": "skyline",
  "navigationStyle": "custom",
  "usingComponents": {
    "navigation-bar": "../../components/navigation-bar"
  }
}
myscrollview.json,使用renderer为skyline,才能打开更多的scroll-view的特性,性能更好,下拉到底的时候有较好的弹性效果
<navigation-bar title="myscrollview测试"/>
<scroll-view
class="box-scroll"
scroll-y='{{true}}'
type='list'
refresher-enabled="true"
refresher-threshold="{}}"
refresher-default-style="black"
refresher-background="white"
refresher-default-style="none"
refresher-triggered="{{triggered}}"
bindrefresherrefresh="onScrollRefresh"
bindscrolltolower="onScrollToEnd">
<view slot="refresher">
<view class="expand">
<view class="refresher-tips">{{'我是自定义的下拉刷新'}}</view>
</view>
</view>
<!-- 数据列表 -->
<view wx:for="{{list}}" wx:key="id" wx:for-item="myitem">
<!-- 数据项内容 -->
<text>{{myitem.content}}</text>
</view>
<view class="bottom">{{'滚动到底部了'}}</view>
</scroll-view>myscrollview.wxml,要点:
- refresher-enabled,启用下拉刷新
- bindrefresherrefresh,下拉刷新触发的回调,这个时候的triggered会自动变成true。
- refresher-triggered,在onScrollRefresh的回调中,需要手动将triggered设置为false,才能完成下拉刷新,将刷新提示收起。
- refresher-default-style=“none”,打开该开关以后,才能自定义下拉刷新的图标。定义的方法就是,写一个slot=“refresher”的view就可以了。
- enable-passive=“{{true}}”,打开该开关以后,性能会更好。
.container {
    height: 100%;
    display: flex;
    flex-direction: column;
    align-items: center;
    justify-content: center;
  }

.box-scroll{
    height:100vh;
}
myscrollview.wxss,简单的样式
const app = getApp<IAppOption>();

let globalId:number = 10001;

type ItemData = {
    id:string;
    content:string;
}
Page({
    data: {
      list: [] as ItemData[], // 数据列表
      triggered: false,
      windowHeight:app.globalData.systemInfo!.windowHeight,
    },
    onLoad: function() {
      this.loadData(); // 初始加载数据
    },
    // 下拉刷新事件处理函数
    onScrollRefresh: function() {
        this.loadData(true);
    },
    // 滑动到底部事件处理函数
    onScrollToEnd: function() {
        console.log('scroll to end');
        this.loadData(false);
    },
    // 加载数据函数(模拟)
    loadData: function(isRefresh = false) {
      let that = this;
      setTimeout(function() {
        let newData = [];
        for (let i = 0; i < 1000; i++) {
            const single:ItemData = {
                id:(globalId++)+'',
                content: `Item ${Math.random()}`
            }
            newData.push(single);
        }
        if (isRefresh) { // 如果是下拉刷新,则替换旧数据
            that.setData({
                list: newData,
                triggered:false,
            });
        } else {
            that.setData({
              list: that.data.list.concat(newData)
            });
        }
      }, 1000);
    },
    loadMoreData: function() {
      this.loadData();
    }
});
myscrollview.ts,较简单的代码
5.2 swiper
{
    "disableScroll": true,
    "renderer": "skyline",
    "navigationStyle": "custom",
    "usingComponents": {
        "navigation-bar": "../../components/navigation-bar"
    }
}
swiper.json
<!--pages/myswiper/myswiper.wxml-->
<navigation-bar title="myswiper测试"/>
<swiper
current="{{current}}"
indicator-dots="{{indicatorDots}}"
indicator-type="{{indicatorType}}"
scroll-with-animation="{{true}}"
autoplay="{{false}}"
circular="{{circular}}"
vertical="{{false}}"
interval="{�}}"
duration="{}}"
cache-extent="3"
previous-margin="{ӎ}}"
next-margin="{ӎ}}"
bind:change="onChange"
bind:transition="onTransition"
bind:animationfinish="onAnimationfinish">
<block wx:for="{{list}}" wx:key="*this">
<swiper-item>
<image class="swiper-item" src="{{item}}" mode="aspectFill" style="background:#ddd"/>
</swiper-item>
</block>
</swiper>swiper.wxml,定义一个swiper,然后,每个swiper下面都必须要用swiper-item。
/* pages/myswiper/myswiper.wxss */
.swiper-item{
    display: block;
    height: 150px;
    width:100%;
}
swiper.wxss,需要将width设置为100%,否则不能占满整个宽度
// pages/myswiper/myswiper.ts
Component({

    /**
     * 组件的属性列表
     */
    properties: {

    },

    /**
     * 组件的初始数据
     */
    data: {
        current:0,//当前所在滑块的 index
        indicatorDots:true,//是否显示面板指示点
        indicatorType:'worm',//指示点动画类型
        circular:true,//是否采用衔接滑动
        list: [
            'https://i1.hdslb.com/bfs/archive/cba282edcc41b3a018f1651130907c2f93e17c5b.jpg',
            'https://gimg2.baidu.com/image_search/src=http%3A%2F%2Fsafe-img.xhscdn.com%2Fbw1%2F0d6be749-99be-447e-a8be-b71116b532e4%3FimageView2%2F2%2Fw%2F1080%2Fformat%2Fjpg&refer=http%3A%2F%2Fsafe-img.xhscdn.com&app=2002&size=f9999,10000&q=a80&n=0&g=0n&fmt=auto?sec=1706756478&t=4ca3fed137241dc66333378926ffc859',
            'https://img1.baidu.com/it/u=1279840328,315377675&fm=253&fmt=auto&app=138&f=JPEG?w=750&h=500',
        ]
    },

    /**
     * 组件的方法列表
     */
    methods: {
        onChange(e:any){
            this.setData({
                current: e.detail.current
            })
        },
        onTransition(e:any) {
            console.info('@@@ onTransition ', e.detail)
        },
        onAnimationfinish(e:any) {
            console.info('@@@ onAnimationfinish ', e.detail)
        },
    }
})
swiper.ts,代码也比较简单,要点:
- current:0,//当前所在滑块的 index
- indicatorDots:true,//是否显示面板指示点
- indicatorType:‘worm’,//指示点动画类型
- circular:true,//是否采用衔接滑动
- bind:change,切换页面时的触发
5.3 picker
尽可能使用微信自带的picker来选择日期时间,性能好,而且没啥bug。
5.4 input
<input class="myInput" value="{{text}}" bind:input="{{onTextChange}}">input标签
.myInput{
  padding-top:20rpx;
  padding-bottom:20rpx;
  font-size:15px;
}
input.css尽量避免使用padding来写样式,渲染出来的页面是不对的。
.myInput{
  height:88rpx;
  line-height:88rpx;
  font-size:15px;
}
input.css应该使用height + line-height来实现
10 FAQ
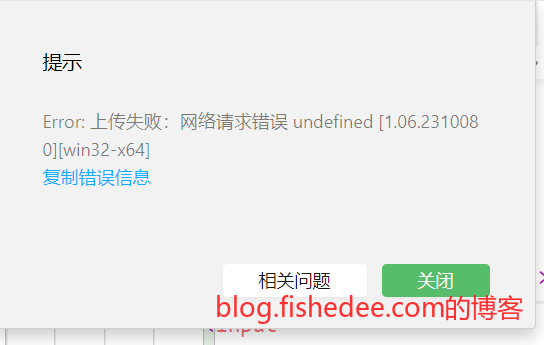
10.1 网络请求错误 undefined [1.06.2310080][win32-x64]
<input
    class="formItemInput"
    placeholder="请输入公司名"
    value="{{company}}"
    focus="{{}}"
    bind:input="onInputCompany"
    bind:confirm="onConfirmCompany"/>
focus参数为空导致的
11 总结
设计不太好的地方:
- 没有彻底的ts模块化,事件需要用triggerEvent,而不是以直接传入的方式来实现。wxml使用bind:tap绑定ts的回调函数的时候,ts中回调函数缺少了回调的参数。
- 复杂和多余的概念,事件冒泡的选择,css样式覆盖的选择,slot的复杂性(现在也没有支持检查slot是否有传入的方法)
- setData更像是React里面的setState,而不是vue的数据响应式。但是,setData没有自动聚合同一个时间片的多个操作
- 本文作者: fishedee
- 版权声明: 本博客所有文章均采用 CC BY-NC-SA 3.0 CN 许可协议,转载必须注明出处!